

1.context.shadowColor:阴影颜色。
2.context.shadowOffsetX:阴影x轴位移。正值向右,负值向左。
3.context.shadowOffsetY:阴影y轴位移。正值向下,负值向上。
4.context.shadowBlur:阴影模糊滤镜。数据越大,扩散程度越大。
这四个属性只要设置了第一个和剩下三个中的任意一个就有阴影效果。不过通常情况下,四个属性都要设置。
例如,创建一个向右下方位移各5px的红色阴影,模糊2px,可以这样写。
context.shadowColor = red;
context.shadowOffsetX = 5;
context.shadowOffsetY = 5;
context.shadowBlur= 2;
需要注意的是,这里的阴影同其他属性设置一样,都是基于状态的设置。因此,如果只想为某一个对象应用阴影而不是全局阴影,需要在下次绘制前重置阴影的这四个属性。
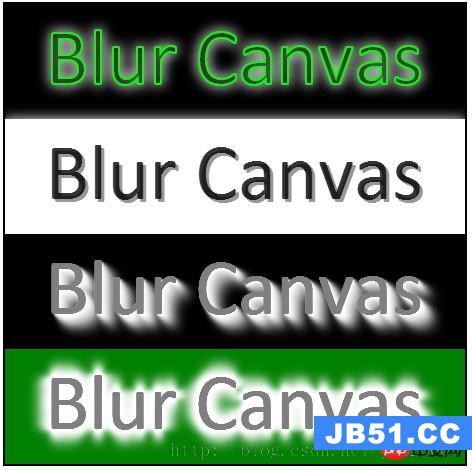
运行结果:
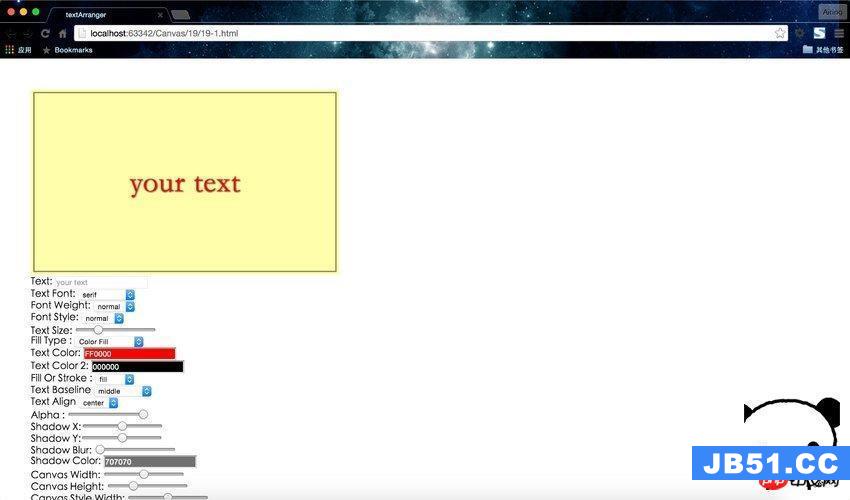
阴影文字:
只要设置shadowOffsetX与shadowOffsetY的值,当值都正数时,阴影相对文字的右下
方偏移。当值都为负数时,阴影相对文字的左上方偏移。
3D拉影效果:
在同一位置不断的重复绘制文字同时改变shadowOffsetX、shadowOffsetY、shadowBlur
的值,从小到大不断偏移不断增加,透明度也不断增加。就得到了拉影效果文字。
在3D拉影效果的基础上在四个方向重复,就得到了边缘羽化的文字效果。
运行效果:
程序代码:
<!DOCTYPE html>
<html>
<head>
<Meta http-equiv=X-UA-Compatible content=chrome=IE8>
<Meta http-equiv=Content-type content=text/html;charset=UTF-8>
<title>Canvas Clip Demo</title>
<link href=default.css rel=stylesheet />
    <script>
        var ctx = null; // global variable 2d context
        var imageTexture = null;
        window.onload = function() {
            var canvas = document.getElementById(text_canvas);
            console.log(canvas.parentNode.clientWidth);
            canvas.width = canvas.parentNode.clientWidth;
            canvas.height = canvas.parentNode.clientHeight;
            if (!canvas.getContext) {
                console.log(Canvas not supported. Please install a HTML5 compatible browser.);
                return;
            }
            var context = canvas.getContext('2d');
            // section one - shadow and blur
            context.fillStyle=black;
            context.fillRect(0, 0, canvas.width, canvas.height/4);
            context.font = '60pt Calibri';
            context.shadowColor = white;
            context.shadowOffsetX = 0;
            context.shadowOffsetY = 0;
            context.shadowBlur = 20;
            context.fillText(Blur Canvas, 40, 80);
            context.strokeStyle = RGBA(0, 255, 0, 1);
            context.linewidth = 2;
            context.strokeText(Blur Canvas, 40, 80);
            // section two - shadow font
            var hh = canvas.height/4;
            context.fillStyle=white;
            context.fillRect(0, hh, canvas.width, canvas.height/4);
            context.font = '60pt Calibri';
            context.shadowColor = RGBA(127,127,127,1);
            context.shadowOffsetX = 3;
            context.shadowOffsetY = 3;
            context.shadowBlur = 0;
            context.fillStyle = RGBA(0, 0, 0, 0.8);
            context.fillText(Blur Canvas, 40, 80+hh);
            // section three - down shadow effect
            var hh = canvas.height/4 + hh;
            context.fillStyle=black;
            context.fillRect(0, hh, canvas.width, canvas.height/4);
            for(var i = 0; i < 10; i++)
            {
                context.shadowColor = RGBA(255, 255, 255, + ((10-i)/10) + );
                context.shadowOffsetX = i*2;
                context.shadowOffsetY = i*2;
                context.shadowBlur = i*2;
                context.fillStyle = RGBA(127, 127, 127, 1);
                context.fillText(Blur Canvas, 40, 80+hh);
            }
            // section four -  fade effect
            var hh = canvas.height/4 + hh;
            context.fillStyle=green;
            context.fillRect(0, hh, canvas.width, canvas.height/4);
            for(var i = 0; i < 10; i++)
            {
                context.shadowColor = RGBA(255, 255, 255, + ((10-i)/10) + );
                context.shadowOffsetX = 0;
                context.shadowOffsetY = -i*2;
                context.shadowBlur = i*2;
                context.fillStyle = RGBA(127, 127, 127, 1);
                context.fillText(Blur Canvas, 40, 80+hh);
            }
            for(var i = 0; i < 10; i++)
            {
                context.shadowColor = RGBA(255, 255, 255, + ((10-i)/10) + );
                context.shadowOffsetX = 0;
                context.shadowOffsetY = i*2;
                context.shadowBlur = i*2;
                context.fillStyle = RGBA(127, 127, 127, 1);
                context.fillText(Blur Canvas, 40, 80+hh);
            }
            for(var i = 0; i < 10; i++)
            {
                context.shadowColor = RGBA(255, 255, 255, + ((10-i)/10) + );
                context.shadowOffsetX = i*2;
                context.shadowOffsetY = 0;
                context.shadowBlur = i*2;
                context.fillStyle = RGBA(127, 127, 127, 1);
                context.fillText(Blur Canvas, 40, 80+hh);
            }
            for(var i = 0; i < 10; i++)
            {
                context.shadowColor = RGBA(255, 255, 255, + ((10-i)/10) + );
                context.shadowOffsetX = -i*2;
                context.shadowOffsetY = 0;
                context.shadowBlur = i*2;
                context.fillStyle = RGBA(127, 127, 127, 1);
                context.fillText(Blur Canvas, 40, 80+hh);
            }
        }
    </script>
</head>
<body>
    <h1>HTML5 Canvas Clip Demo - By Gloomy Fish</h1>
    <pre>Fill And stroke Clip</pre>
    <p id=my_painter>
        <canvas id=text_canvas></canvas>
    </p>
</body>
</html>
版权声明:本文内容由互联网用户自发贡献,该文观点与技术仅代表作者本人。本站仅提供信息存储空间服务,不拥有所有权,不承担相关法律责任。如发现本站有涉嫌侵权/违法违规的内容, 请发送邮件至 dio@foxmail.com 举报,一经查实,本站将立刻删除。

