为什么探讨这个问题
一般来说,使用 RN 构建应用已经足够了,有两种情况,我们需要考虑这个问题:
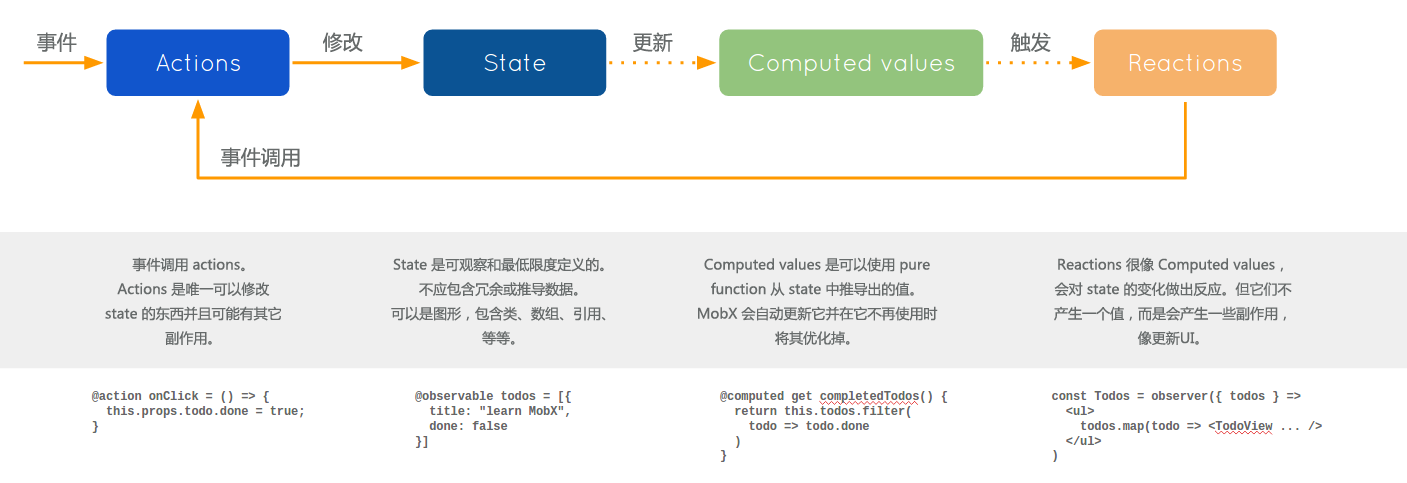
一张图说明整个流程概括
可能性
- 了解,RN 定义 JS 模块,注册 JS 模块,以及使用 JS 模块的机制
定义 JS 模块
首先定义,创建源代码,实现基本的 RN 逻辑。
定义好的 JS 源代码是通过 Babel 编译后的 JS 文件,使用了静态的 require 方法,载入不同的子模块。对于任何:
export default class Example ...

import Example from './Example'...
使用 react-native bundle 命令:
react-native bundle --platform android --dev false --entry-file index.androidtest.js --bundle-output ./test.bundle.js --assets-dest android/app/src/main/res/
__d(function (e,t,r,l) {
  ...
  t(12),// react
  t(24),// react-native
  t(271),// Example

},0);

...

;require(0); // 第一个组件/模块,通常是用 AppRegistry 注册的那个组件
模块之间,使用 ID 来标示,载入模块通过 require(ID) 来实现,依赖通过参数 t 来确认,所以当一个 JS 模块,载入另一个模块的时候,保证了前一个模块的存在。
注册 JS 模块
注册的目的,是告诉 RN 又这样一个个模块,可以被 Android 独立使用,同时提供了调用此 JS 模块的开始入口。
这是通过 AppRegistry 完成的,同时,使用 AppRegistry 的 registerComponent 可以注册多个模块的,从后面的分析可以看出,每一个 ReactActivity 都有一个默认的 ReactRootView,每一个 Activity 都可以独立使用自己的模块,模块建立的 UI 层面,将会在 ReactRootView 里面呈现。
// RN / Libraries / ReactNative / AppRegistry.js

 registerComponent: function(appKey: string,getComponentFunc: ComponentProvider): string {
    runnables[appKey] = {
      run: (appParameters) =>
        renderApplication(getComponentFunc(),appParameters.initialProps,appParameters.roottag)
    };
    return appKey;
  },
真正的运行,是位于 AppRegistry 的 runApplication,做下面的工作:
而 runApplication 是运行这个模块的起点,
// RN / Libraries / ReactNative / AppRegistry.js
  runApplication: function(appKey: string,appParameters: any): void {
    const msg =
      'Running application "' + appKey + '" with appParams: ' +
      JSON.stringify(appParameters) + '. ' +
      '__DEV__ === ' + String(__DEV__) +
      ',development-level warning are ' + (__DEV__ ? 'ON' : 'OFF') +
      ',performance optimizations are ' + (__DEV__ ? 'OFF' : 'ON');
    infoLog(msg);
    BugReporting.addSource('AppRegistry.runApplication' + runcount++,() => msg);
    invariant(
      runnables[appKey] && runnables[appKey].run,'Application ' + appKey + ' has not been registered. This ' +
      'is either due to a require() error during initialization ' +
      'or failure to call AppRegistry.registerComponent.'
    );
    runnables[appKey].run(appParameters);
  },
// RN / Libraries / ReactNative / renderApplication.js
ReactNative.render(
    <AppContainer roottag={roottag}>
      <RootComponent
        {...initialProps}
        roottag={roottag}
      />
    </AppContainer>,roottag
  );
这里,appKey,实际上是注册时候,使用的模块名字。
运行 JS 模块
我们先看看如何运行 JS 模块的,然后在详细的看看是如何载入 JS 模块的,载入 JS 模块这部分相对复杂,也涉及到,能否分解 JS Bundle 文件,能否载入小的 JS Bundle 文件,并按照需要,载入不同的 JS Bundle 文件的关键所在。
下面是当 Activity 创建之后,开始运行 JS 模块的部分。
在 Android 的部分,基于 RN 的 MainActivity 是派生于 ReactActivity 。
当 Activity 被创建的时候,ReactActivity 同时创建了一个 ReactActivityDelegate , 用作处理多种任务的代理。
protected ReactActivity() {
    mDelegate = createReactActivityDelegate();
  }

  /**
   * Returns the name of the main component registered from JavaScript.
   * This is used to schedule rendering of the component.
   * e.g. "MoviesApp"
   */
  protected @Nullable String getMainComponentName() {
    return null;
  }

  /**
   * Called at construction time,override if you have a custom delegate implementation.
   */
  protected ReactActivityDelegate createReactActivityDelegate() {
    return new ReactActivityDelegate(this,getMainComponentName());
  }
而默认的 MainActivity ,会提供覆盖的 getMainComponentName 方法,这个方法提供的是当前的模块的名字,也就是使用 AppRegistry 注册的任意一个模块的名字。
在创建 ReactActivityDelegate 的时候,传递的模块过去,整个过程中保持了对这个模块的使用。
与此同时,在 ReactActivity 里面的 onCreate 以及 onActivityResult 方法中,使用了上面的代理,
@Override
  protected void onCreate(Bundle savedInstanceState) {
    super.onCreate(savedInstanceState);
    mDelegate.onCreate(savedInstanceState);
  }

 @Override
  public void onActivityResult(int requestCode,int resultCode,Intent data) {
    mDelegate.onActivityResult(requestCode,resultCode,data);
  }
这两个方法,是 Android 的 Activity 默认提供的方法,会被系统自动调用,创建之后,或者是从某个 Activity 返回的时候。
然后,可以看到,在创建 ReactActivityDelegate 的 onCreate 方法中,以及 onActivityResult 方法中,调用了 loadApp ,如下。
protected void onCreate(Bundle savedInstanceState) {
    boolean needsOverlayPermission = false;
    if (getReactNativeHost().getUseDeveloperSupport() && Build.VERSION.SDK_INT >= Build.VERSION_CODES.M) {
      // Get permission to show redBox in dev builds.
      if (!Settings.canDrawOverlays(getContext())) {
        needsOverlayPermission = true;
        Intent serviceIntent = new Intent(Settings.ACTION_MANAGE_OVERLAY_PERMISSION,Uri.parse("package:" + getContext().getPackageName()));
        FLog.w(ReactConstants.TAG,REDBox_PERMISSION_MESSAGE);
        Toast.makeText(getContext(),REDBox_PERMISSION_MESSAGE,Toast.LENGTH_LONG).show();
        ((Activity) getContext()).startActivityForResult(serviceIntent,REQUEST_OVERLAY_PERMISSION_CODE);
      }
    }

    if (mMainComponentName != null && !needsOverlayPermission) {
      loadApp(mMainComponentName);
    }
    mDoubleTapReloadRecognizer = new DoubleTapReloadRecognizer();
  }

  public void onActivityResult(int requestCode,Intent data) {
    if (getReactNativeHost().hasInstance()) {
      getReactNativeHost().getReactInstanceManager()
        .onActivityResult(getPlainActivity(),requestCode,data);
    } else {
      // Did we request overlay permissions?
      if (requestCode == REQUEST_OVERLAY_PERMISSION_CODE && Build.VERSION.SDK_INT >= Build.VERSION_CODES.M) {
        if (Settings.canDrawOverlays(getContext())) {
          if (mMainComponentName != null) {
            loadApp(mMainComponentName);
          }
          Toast.makeText(getContext(),REDBox_PERMISSION_GRANTED_MESSAGE,Toast.LENGTH_LONG).show();
        }
      }
    }
  }
而在 ReactActivityDelegate 里面,创建了 ReactRootView,作为 ReactActivity 的默认的视图 。
protected void loadApp(String appKey) {
    if (mReactRootView != null) {
      throw new IllegalStateException("Cannot loadApp while app is already running.");
    }
    mReactRootView = createRootView();
    mReactRootView.startReactApplication(
      getReactNativeHost().getReactInstanceManager(),appKey,getLaunchOptions());
    getPlainActivity().setContentView(mReactRootView);
  }
这里,可以看到 ReactRootView,调用了 startReactApplication,来看看是如何工作的:
public void startReactApplication(
      ReactInstanceManager reactInstanceManager,String moduleName,@Nullable Bundle launchOptions) {
    UiThreadUtil.assertOnUiThread();

    // Todo(6788889): Use POJO instead of bundle here,apparently we can't just use WritableMap
    // here as it may be deallocated in native after passing via JNI bridge,but we want to reuse
    // it in the case of re-creating the catalyst instance
    Assertions.assertCondition(
        mReactInstanceManager == null,"This root view has already been attached to a catalyst instance manager");

    mReactInstanceManager = reactInstanceManager;
    mJSModuleName = moduleName;
    mLaunchOptions = launchOptions;

    if (!mReactInstanceManager.hasstartedCreatingInitialContext()) {
      mReactInstanceManager.createReactContextInBackground();
    }

    // We need to wait for the initial onMeasure,if this view has not yet been measured,we set which
    // will make this view startReactApplication itself to instance manager once onMeasure is called.
    if (mWasMeasured) {
      attachToReactInstanceManager();
    }
  }
上面的代码,比较复杂,现在先看最后一步, 当 UI 加载完成,并且获得了确定的 Layout 的时候,开始,
private void attachToReactInstanceManager() {
    if (mIsAttachedToInstance) {
      return;
    }

    mIsAttachedToInstance = true;
    Assertions.assertNotNull(mReactInstanceManager).attachMeasuredRootView(this);
    getViewTreeObserver().addOnGlobalLayoutListener(getCustomGlobalLayoutListener());
  }
注意这里的,(mReactInstanceManager).attachMeasuredRootView(this),是调用了 XReactInstanceManagerImpl 里面的:
/**
   * Attach given {@param rootView} to a catalyst instance manager and start JS application using
   * JS module provided by {@link ReactRootView#getJSModuleName}. If the react context is currently
   * being (re)-created,or if react context has not been created yet,the JS application associated
   * with the provided root view will be started asynchronously,i.e this method won't block.
   * This view will then be tracked by this manager and in case of catalyst instance restart it will
   * be re-attached.
   */

  @Override
  public void attachMeasuredRootView(ReactRootView rootView) {
    UiThreadUtil.assertOnUiThread();
    mAttachedRootViews.add(rootView);

    // If react context is being created in the background,JS application will be started
    // automatically when creation completes,as root view is part of the attached root view list.
    if (mReactContextinitAsyncTask == null && mCurrentReactContext != null) {
      attachMeasuredRootViewToInstance(rootView,mCurrentReactContext.getCatalystInstance());
    }
  }
看看官方的注释解释,catalyst instance manager 是操作 Android-JSC 的入口。所谓的 react context,是 RN 的环境在 Java 中的表示,包括各种原生模块、包等等的初始化,如果一切就绪,会转到下面的方法:
private void attachMeasuredRootViewToInstance(
      ReactRootView rootView,CatalystInstance catalystInstance) {
    Systrace.beginSection(TRACE_TAG_REACT_JAVA_BRIDGE,"attachMeasuredRootViewToInstance");
    UiThreadUtil.assertOnUiThread();

    // Reset view content as it's going to be populated by the application content from JS
    rootView.removeAllViews();
    rootView.setId(View.NO_ID);

    UIManagerModule uiManagerModule = catalystInstance.getNativeModule(UIManagerModule.class);
    int roottag = uiManagerModule.addMeasuredRootView(rootView);
    rootView.setRootViewTag(roottag);
    @Nullable Bundle launchOptions = rootView.getLaunchOptions();
    WritableMap initialProps = Arguments.makeNativeMap(launchOptions);
    String jsAppModuleName = rootView.getJSModuleName();

    WritableNativeMap appParams = new WritableNativeMap();
    appParams.putDouble("roottag",roottag);
    appParams.putMap("initialProps",initialProps);
    catalystInstance.getJSModule(AppRegistry.class).runApplication(jsAppModuleName,appParams);
    rootView.onAttachedToReactInstance();
    Systrace.endSection(TRACE_TAG_REACT_JAVA_BRIDGE);
  }
可以看到这里,rootView 会把已经加载的所有的 UI 都卸载掉,然后,开始运行,关键是这一步,
catalystInstance.getJSModule(AppRegistry.class).runApplication(jsAppModuleName,appParams);
在这一步,是通过 Android-JSC 注册的 RN 官方的 JS 模块,直接调用了 JS 的方法,也就是 AppRegistry 上面的 runApplication 方法,开始启动 JS Bundle 并运行。
到这里为止,已经完成了对于 JS 模块的调用。
- 总而言之
在 JS 模块载入之后,Activity 会在创建的时候开始运行 JS 模块中 AppRegistry 的 runApplication 方法,并使用在此 Activity 中定义的模块名字来确定是一个模块,你可以注册多个模块,使用不同的名字,分别在不同的 Activity 里面使用,但是默认所有不同的模块,都位于同一个 JS Bundle 文件中,默认是在 MainApplication,也就是 ReactApplication 里面载入的。
所以,对于原生的 Android 应用,完全可以通过派生 ReactApplication,来使用 RN 的各种不同的模块,每一个模块使用唯一的 ReactActivity 承载。
每一个 Activity 默认有唯一一个 ReactRootView ,当运行 JS 模块的时候,是等待这个 View 初始化完成(是异步过程),位置、大小确定之后,从而可以把 RN 中的 UI 组件载入到正确的位置。
而运行 JS 模块之前,保证 JS 模块载入,同时保证 RN 的原生环境已经完成,这包括各种官方模块,以及自定义的模块的注册等等,因此,后面 JS 使用中不会出现任何问题。
另外有趣的是,ReactActivity 中,为内部的组件定义了 loadApp 方法,
protected final void loadApp(String appKey) {
    mDelegate.loadApp(appKey);
  }
并没有使用,对于任何原生的模块而言,都可以调用这个方法,而在 ReactTestActivity 中,有一个有趣的使用模式,
public void loadApp(
    String appKey,ReactInstanceSpecForTest spec,@Nullable Bundle initialProps,String bundleName,boolean useDevSupport,UIImplementationProvider uiImplementationProvider) {

    final CountDownLatch currentLayoutEvent = mLayoutEvent = new CountDownLatch(1);
    mBridgeIdleSignaler = new ReactBridgeIdleSignaler();

    ReactInstanceManager.Builder builder =
      ReactTestHelper.getReactTestFactory().getReactInstanceManagerBuilder()
        .setApplication(getApplication())
        .setBundleAssetName(bundleName)
        // By not setting a JS module name,we force the bundle to be always loaded from
        // assets,not the devserver,even if dev mode is enabled (such as when testing redBoxes).
        // This makes sense because we never run the devserver in tests.
        //.setJSMainModuleName()
        .addPackage(spec.getAlternativeReactPackageFortest() != null ?
            spec.getAlternativeReactPackageFortest() : new MainReactPackage())
        .addPackage(new InstanceSpecForTestPackage(spec))
        .setUseDeveloperSupport(useDevSupport)
        .setBridgeIdleDebugListener(mBridgeIdleSignaler)
        .setinitialLifecycleState(mLifecycleState)
        .setUIImplementationProvider(uiImplementationProvider);

    mReactInstanceManager = builder.build();
    mReactInstanceManager.onHostResume(this,this);

    Assertions.assertNotNull(mReactRootView).getViewTreeObserver().addOnGlobalLayoutListener(
        new ViewTreeObserver.OnGlobalLayoutListener() {
          @Override
          public void onGlobalLayout() {
            currentLayoutEvent.countDown();
          }
        });
    Assertions.assertNotNull(mReactRootView)
        .startReactApplication(mReactInstanceManager,initialProps);
  }
为什么有趣呢,因为 ReactInstanceManager 涉及到了 JS 模块的载入,这里的方法,实际上提供了,在 Activity 里面,载入 JS 模块,并运行的方法。
而默认的 Android 部分,是通过 MainApplication 来载入唯一的 JS 模块(虽然你可以定义 JS 所在的位置),如果上面的方法成立,就可以在每一个 Activity 里面,载入不同的 JS 模块,下面看看 JS 是如何载入的。
JS 模块如何载入
JS 模块的载入,是运行 JS Bundle 的基础,默认的,JS 模块的载入,是在当前的 MainApplication 里面完成的。
当 Android 部分启动的时候,首先创建了一个 MainApplication,这里实现了 ReactApplication 接口。
而这个接口需要提供的唯一的方法就是:
private final ReactNativeHost mReactNativeHost = new ReactNativeHost(this) {
    @Override
    public boolean getUseDeveloperSupport() {
      return BuildConfig.DEBUG;
    }

    @Override
    protected List<ReactPackage> getPackages() {
      return Arrays.<ReactPackage>asList(
          new MainReactPackage(),new RNChinesetoPinyinPackage(),new LinearGradientPackage(),new RCTCameraPackage(),new RNFSPackage(),new RealmReactPackage(),new VectorIconsPackage()
      );
    }
  };

  @Override
  public ReactNativeHost getReactNativeHost() {
    return mReactNativeHost;
  }


  @Override
  public void onCreate() {
    super.onCreate();
    SoLoader.init(this,/* native exopackage */ false);
  }
ReactNativeHost 是一个抽象类,所以,可以在实现中,覆盖原来的方法,那么,来看看有哪些主要方法,
用来获得 ReactInstanceManager,ReactInstancemanger 是载入 JS Bundle 的主要入口
public ReactInstanceManager getReactInstanceManager() {
    if (mReactInstanceManager == null) {
      mReactInstanceManager = createReactInstanceManager();
    }
    return mReactInstanceManager;
  }

  public boolean hasInstance() {
    return mReactInstanceManager != null;
  }

  public void clear() {
    if (mReactInstanceManager != null) {
      mReactInstanceManager.destroy();
      mReactInstanceManager = null;
    }
  }

protected ReactInstanceManager createReactInstanceManager() {
    ReactInstanceManager.Builder builder = ReactInstanceManager.builder()
      .setApplication(mApplication)
      .setJSMainModuleName(getJSMainModuleName())
      .setUseDeveloperSupport(getUseDeveloperSupport())
      .setRedBoxHandler(getRedBoxHandler())
      .setUIImplementationProvider(getUIImplementationProvider())
      .setinitialLifecycleState(LifecycleState.BEFORE_CREATE);

    for (ReactPackage reactPackage : getPackages()) {
      builder.addPackage(reactPackage);
    }

    String jsBundleFile = getJSBundleFile();
    if (jsBundleFile != null) {
      builder.setJSBundleFile(jsBundleFile);
    } else {
      builder.setBundleAssetName(Assertions.assertNotNull(getBundleAssetName()));
    }
    return builder.build();
  }
可以看到,在创建 ReactInstanceManager 的过程中,可以设置 JS Bundle 为文件位置,或者是模块名(默认位置在 assets 中)。
方法是,覆盖 ReactNativeHost 以上的两个方法,getJSMainModuleName() 或 getJSBundleFile 。
然后,来看看其使用的 ReactInstanceManager.Builder 调用了 Builder.build 在做什么。
public ReactInstanceManager build() {
      Assertions.assertNotNull(
        mApplication,"Application property has not been set with this builder");

      Assertions.assertCondition(
        mUseDeveloperSupport || mJSBundleAssetUrl != null || mJSBundleLoader != null,"JS Bundle File or Asset URL has to be provided when dev support is disabled");

      Assertions.assertCondition(
        mJSMainModuleName != null || mJSBundleAssetUrl != null || mJSBundleLoader != null,"Either MainModuleName or JS Bundle File needs to be provided");

      if (mUIImplementationProvider == null) {
        // create default UIImplementationProvider if the provided one is null.
        mUIImplementationProvider = new UIImplementationProvider();
      }

      return new XReactInstanceManagerImpl(
        mApplication,mCurrentActivity,mDefaultHardwareBackBtnHandler,(mJSBundleLoader == null && mJSBundleAssetUrl != null) ?
          JSBundleLoader.createAssetLoader(mApplication,mJSBundleAssetUrl) : mJSBundleLoader,mJSMainModuleName,mPackages,mUseDeveloperSupport,mBridgeIdleDebugListener,Assertions.assertNotNull(mInitialLifecycleState,"Initial lifecycle state was not set"),mUIImplementationProvider,mNativeModuleCallExceptionHandler,mJSCConfig,mRedBoxHandler,mLazyNativeModulesEnabled,mLazyViewManagersEnabled);
    }
  }
可以看出来,真正的方法的实施,是位于 XReactInstanceManagerImpl 里面,而这一步是载入的关键,
(mJSBundleLoader == null && mJSBundleAssetUrl != null) ?
          JSBundleLoader.createAssetLoader(mApplication,
这里传递的参数, mJSBundleAssetUrl 是前面定义的 JS Bundle 所在的位置,默认是 assets://index.android.bundle,可以改写其位置。
默认的会创建一个 Asset 类型的 JSBundleLoader,那么,这个 Loader 到底是怎样的呢?
/**
   * This loader is recommended one for release version of your app. In that case local JS executor
   * should be used. JS bundle will be read from assets in native code to save on passing large
   * strings from java to native memory.
   */
  public static JSBundleLoader createAssetLoader(
      final Context context,final String assetUrl) {
    return new JSBundleLoader() {
      @Override
      public void loadScript(CatalystInstanceImpl instance) {
        instance.loadScriptFromAssets(context.getAssets(),assetUrl);
      }

      @Override
      public String getSourceUrl() {
        return assetUrl;
      }
    };
  }
其提供了两个方法,其中最主要的是 loadScript,如前所言 CatalystInstanceImpl 是提供 Android-JSC 接口的实现,loadScriptFromAssets 是其内部的实现。所需要了解的是,其使用了两个参数,mApplication,mJSBundleAssetUrl ,从而可以得到当前的 assets 的位置,已经要载入的 JS Bundle 的 URL 路径,例如 assets://index.android.bundle 。
很显然,在后面的操作中,要使用 loadScript 来载入 JS Bundle 。
回到上面的 XReactInstanceManagerImpl 部分,在这里使用 JSBundleLoader 的公开接口是,
/**
   * Trigger react context initialization asynchronously in a background async task. This enables
   * applications to pre-load the application JS,and execute global code before
   * {@link ReactRootView} is available and measured. This should only be called the first time the
   * application is set up,which is enforced to keep developers from accidentally creating their
   * application multiple times without realizing it.
   *
   * Called from UI thread.
   */
  @Override
  public void createReactContextInBackground() {
    Assertions.assertCondition(
        !mHasstartedCreatingInitialContext,"createReactContextInBackground should only be called when creating the react " +
            "application for the first time. When reloading JS,e.g. from a new file,explicitly" +
            "use recreateReactContextInBackground");

    mHasstartedCreatingInitialContext = true;
    recreateReactContextInBackgroundInner();
  }
/**
   * Recreate the react application and context. This should be called if configuration has
   * changed or the developer has requested the app to be reloaded. It should only be called after
   * an initial call to createReactContextInBackground.
   *
   * Called from UI thread.
   */
  public void recreateReactContextInBackground() {
    Assertions.assertCondition(
        mHasstartedCreatingInitialContext,"recreateReactContextInBackground should only be called after the initial " +
            "createReactContextInBackground call.");
    recreateReactContextInBackgroundInner();
  }

  private void recreateReactContextInBackgroundInner() {
    UiThreadUtil.assertOnUiThread();

    if (mUseDeveloperSupport && mJSMainModuleName != null) {
      final DeveloperSettings devSettings = mDevSupportManager.getDevSettings();

      // If remote JS debugging is enabled,load from dev server.
      if (mDevSupportManager.hasUpToDateJSBundleInCache() &&
          !devSettings.isRemoteJSDebugEnabled()) {
        // If there is a up-to-date bundle downloaded from server,// with remote JS debugging disabled,always use that.
        onjsBundleLoadedFromServer();
      } else if (mBundleLoader == null) {
        mDevSupportManager.handleReloadJS();
      } else {
        mDevSupportManager.isPackagerRunning(
            new DevServerHelper.PackagerStatusCallback() {
              @Override
              public void onPackagerStatusFetched(final boolean packagerIsRunning) {
                UiThreadUtil.runOnUiThread(
                    new Runnable() {
                      @Override
                      public void run() {
                        if (packagerIsRunning) {
                          mDevSupportManager.handleReloadJS();
                        } else {
                          // If dev server is down,disable the remote JS debugging.
                          devSettings.setRemoteJSDebugEnabled(false);
                          recreateReactContextInBackgroundFromBundleLoader();
                        }
                      }
                    });
              }
            });
      }
      return;
    }

    recreateReactContextInBackgroundFromBundleLoader();
  }

  private void recreateReactContextInBackgroundFromBundleLoader() {
    recreateReactContextInBackground(
        new JSCJavaScriptExecutor.Factory(mJSCConfig.getConfigMap()),mBundleLoader);
  }
从官方的注释上解读,第一种情况,在 Application 里面初始化 RN 环境,第二种情况,在初始化之后,再次初始化 RN 环境,用在再次载入里面,在调试 RN 的应用时候经常用到的 Live Reload 是这种情况。
而以上两种公开的接口,内部执行的,是 recreateReactContextInBackground ,这里,
private void recreateReactContextInBackground(
      JavaScriptExecutor.Factory jsExecutorFactory,JSBundleLoader jsBundleLoader) {
    UiThreadUtil.assertOnUiThread();

    ReactContextinitParams initParams =
        new ReactContextinitParams(jsExecutorFactory,jsBundleLoader);
    if (mReactContextinitAsyncTask == null) {
      // No background task to create react context is currently running,create and execute one.
      mReactContextinitAsyncTask = new ReactContextinitAsyncTask();
      mReactContextinitAsyncTask.executeOnExecutor(AsyncTask.THREAD_POOL_EXECUTOR,initParams);
    } else {
      // Background task is currently running,queue up most recent init params to recreate context
      // once task completes.
      mPendingReactContextinitParams = initParams;
    }
  }
先抛开这里的细节部分,看看,真正如何使用这两个公开的 API ,是在 ReactRootView 中的 startApplication 中使用,并且是在运行 JS Bundle 之前,
if (!mReactInstanceManager.hasstartedCreatingInitialContext()) {
      mReactInstanceManager.createReactContextInBackground();
    }

    // We need to wait for the initial onMeasure,we set which
    // will make this view startReactApplication itself to instance manager once onMeasure is called.
    if (mWasMeasured) {
      attachToReactInstanceManager();
    }
按照官方的说法,第一个 API 只能在 Application 中使用一次,如果要动态载入,那么需要调用第二个 API ,那么,动态载入不同的 JS Bundle 的方法,应该是依赖于第二个 API 的使用,虽然如此,所谓的动态载入,依然是载入一个整体的 JS Bundle ,而不是一部分。
(TO BE CONTINUED)
版权声明:本文内容由互联网用户自发贡献,该文观点与技术仅代表作者本人。本站仅提供信息存储空间服务,不拥有所有权,不承担相关法律责任。如发现本站有涉嫌侵权/违法违规的内容, 请发送邮件至 dio@foxmail.com 举报,一经查实,本站将立刻删除。


