比较精细的动画可以用Animated来控制。但是,在一些简单的界面切换、更新的时候所做的动画里再去计算开始值、结束值和插值器如何运作绝对是浪费时间。
RN正好给我们提供了LayoutAnimation来解决这个问题。按照官方的说法:LayoutAnimation就是用于在下一个绘制或者布局周期(render/layout cycle)里处理界面中全部视图的动画的。
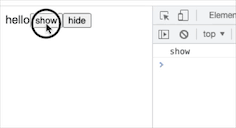
下面看一个例子:
export default class DemoLayoutAnimation extends React.Component {
  constructor(props) {
    super(props);
    this.state = {
      width: 100,height: 100,};
    this._onPress = this._onPress.bind(this);
  }

  componentwillMount() {
    LayoutAnimation.spring();
  }

  _onPress() {
    LayoutAnimation.spring();
    this.setState({width: this.state.width + 20,height: this.state.height + 20});
  }

  render() {
    return (
      <View style={styles.container}> <View style={[styles.Box, {width: this.state.width,height: this.state.height}]} /> <TouchableOpacity onPress={this._onPress}> <View style={styles.button}> <Text style={styles.buttonText}>Press me!</Text> </View> </TouchableOpacity> </View> ); } };
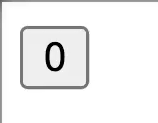
效果就是这样的。
使用的时候也非常简单,只需要在更新State之前调用一下LayoutAnimation.sprint()这么一行代码。
LayoutAnimation默认的提供了三种动画:linear,spring和easeInEaSEOut。 当然,RN也留出了自定义的接口。你可以按照自己需要的自定义动画效果。
下面看看如何自定义:
import //...略...
const customAnim = {
  customSpring: {
    duration: 400,create: {
      type: LayoutAnimation.Types.spring,property: LayoutAnimation.Properties.scaleXY,springdamping: 0.6
    },update: {
      type: LayoutAnimation.Types.spring,springdamping: 0.6
    }
  },customLinear: {
    duration: 200,create: {
      type: LayoutAnimation.Types.linear,property: LayoutAnimation.Properties.opacity,},update: {
      type: LayoutAnimation.Types.easeInEaSEOut
    }
  }
};

export default class DemoLayoutAnimation extends React.Component {
  componentwillUpdate() {
    LayoutAnimation.configureNext(customAnim.customLinear);
  }

  _onPress() {
    // LayoutAnimation.spring();
    this.setState({ width: this.state.width + 20,height: this.state.height + 20 });
  }

  //...略...
};
自定义非常简单,当然限制也不少。只需要指定动画的duration、create和update。
另外一个本例与上例不同的地方在于LayoutAnimation可以只在componentwillUpdate()方法里指定,不需要在点击事件里指定。
完整代码
//@flow

import React from 'react';
import {
  View,Text,TouchableOpacity,LayoutAnimation,StyleSheet,} from 'react-native';

const customAnim = {
  customSpring: {
    duration: 400,update: {
      type: LayoutAnimation.Types.easeInEaSEOut
    }
  }
};

export default class DemoLayoutAnimation extends React.Component {
  constructor(props) {
    super(props);
    this.state = {
      width: 100,};
    this._onPress = this._onPress.bind(this);
    this._createAnimation = this._createAnimation.bind(this);
  }

  // componentwillMount() {
  // LayoutAnimation.spring();
  // }

  componentwillUpdate() {
    LayoutAnimation.configureNext(customAnim.customLinear);
  }

  _onPress() {
    // LayoutAnimation.spring();
    this.setState({ width: this.state.width + 20,height: this.state.height + 20 });
  }

  render() {
    return (
      <View style={styles.container}> <View style={[styles.Box, { width: this.state.width,height: this.state.height }]} /> <TouchableOpacity onPress={this._onPress}> <View style={styles.button}> <Text style={styles.buttonText}>Press me!</Text> </View> </TouchableOpacity> </View> ); } }; const styles = StyleSheet.create({ container: { flex: 1,alignItems: 'center',justifyContent: 'center' },Box: { backgroundColor: 'red' },button: { marginTop: 10,paddingVertical: 10,paddingHorizontal: 20,backgroundColor: 'black' },buttonText: { color: 'white',fontSize: 16,fontWeight: 'bold' } });
版权声明:本文内容由互联网用户自发贡献,该文观点与技术仅代表作者本人。本站仅提供信息存储空间服务,不拥有所有权,不承担相关法律责任。如发现本站有涉嫌侵权/违法违规的内容, 请发送邮件至 dio@foxmail.com 举报,一经查实,本站将立刻删除。