

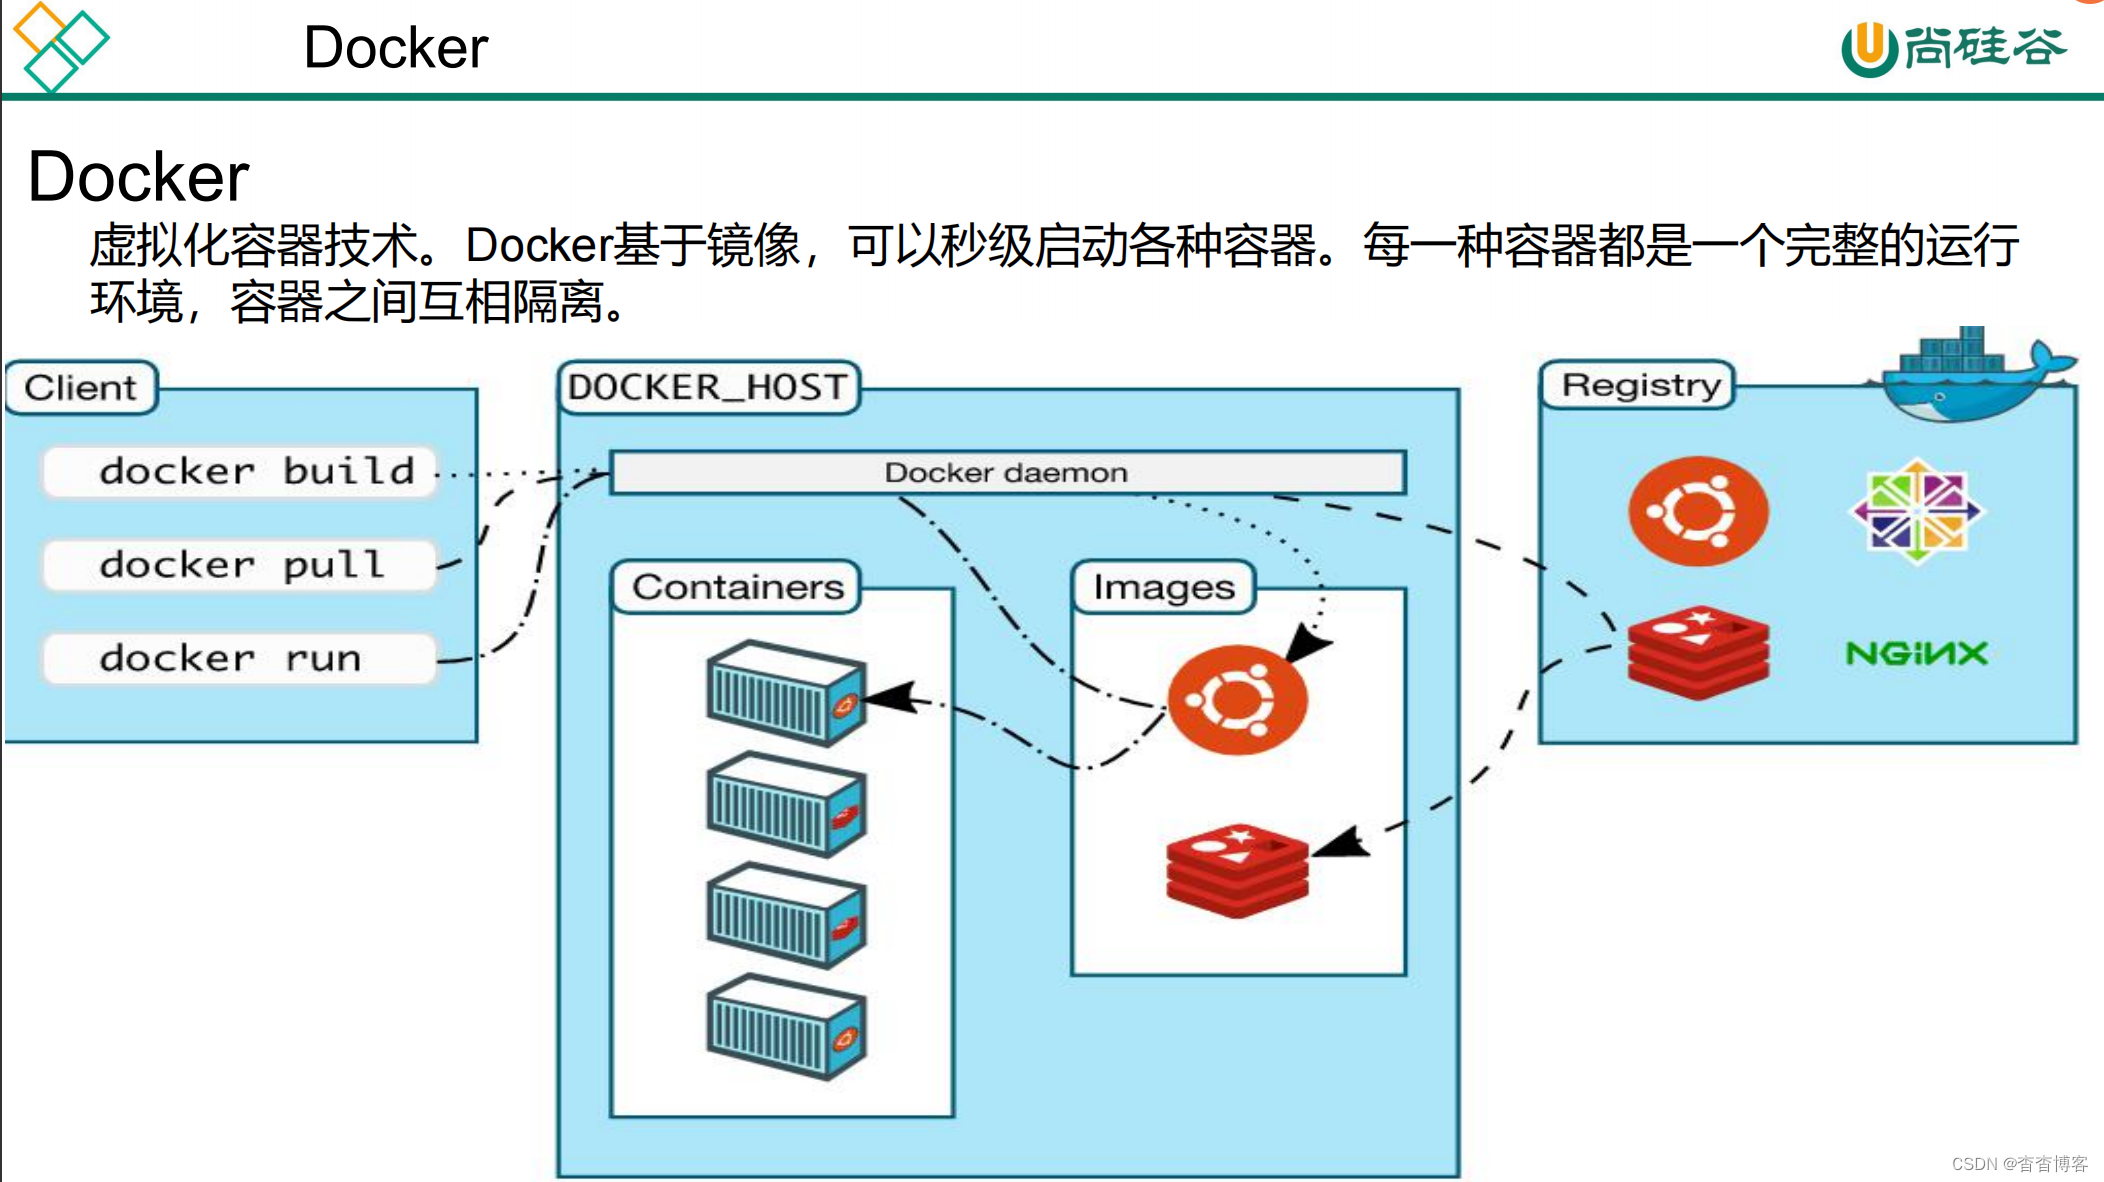
前期配置:虚拟机
安装VirtyalBox 管理器
vagrant安装centos7的虚拟机可以使用镜像
科大镜像:https://docker.mirrors.ustc.edu.cn/
网易:https://hub-mirror.c.163.com/
阿里云镜像获取地址:https://cr.console.aliyun.com/cn-hangzhou/instances/mirrors登录后
# 中科大的镜像
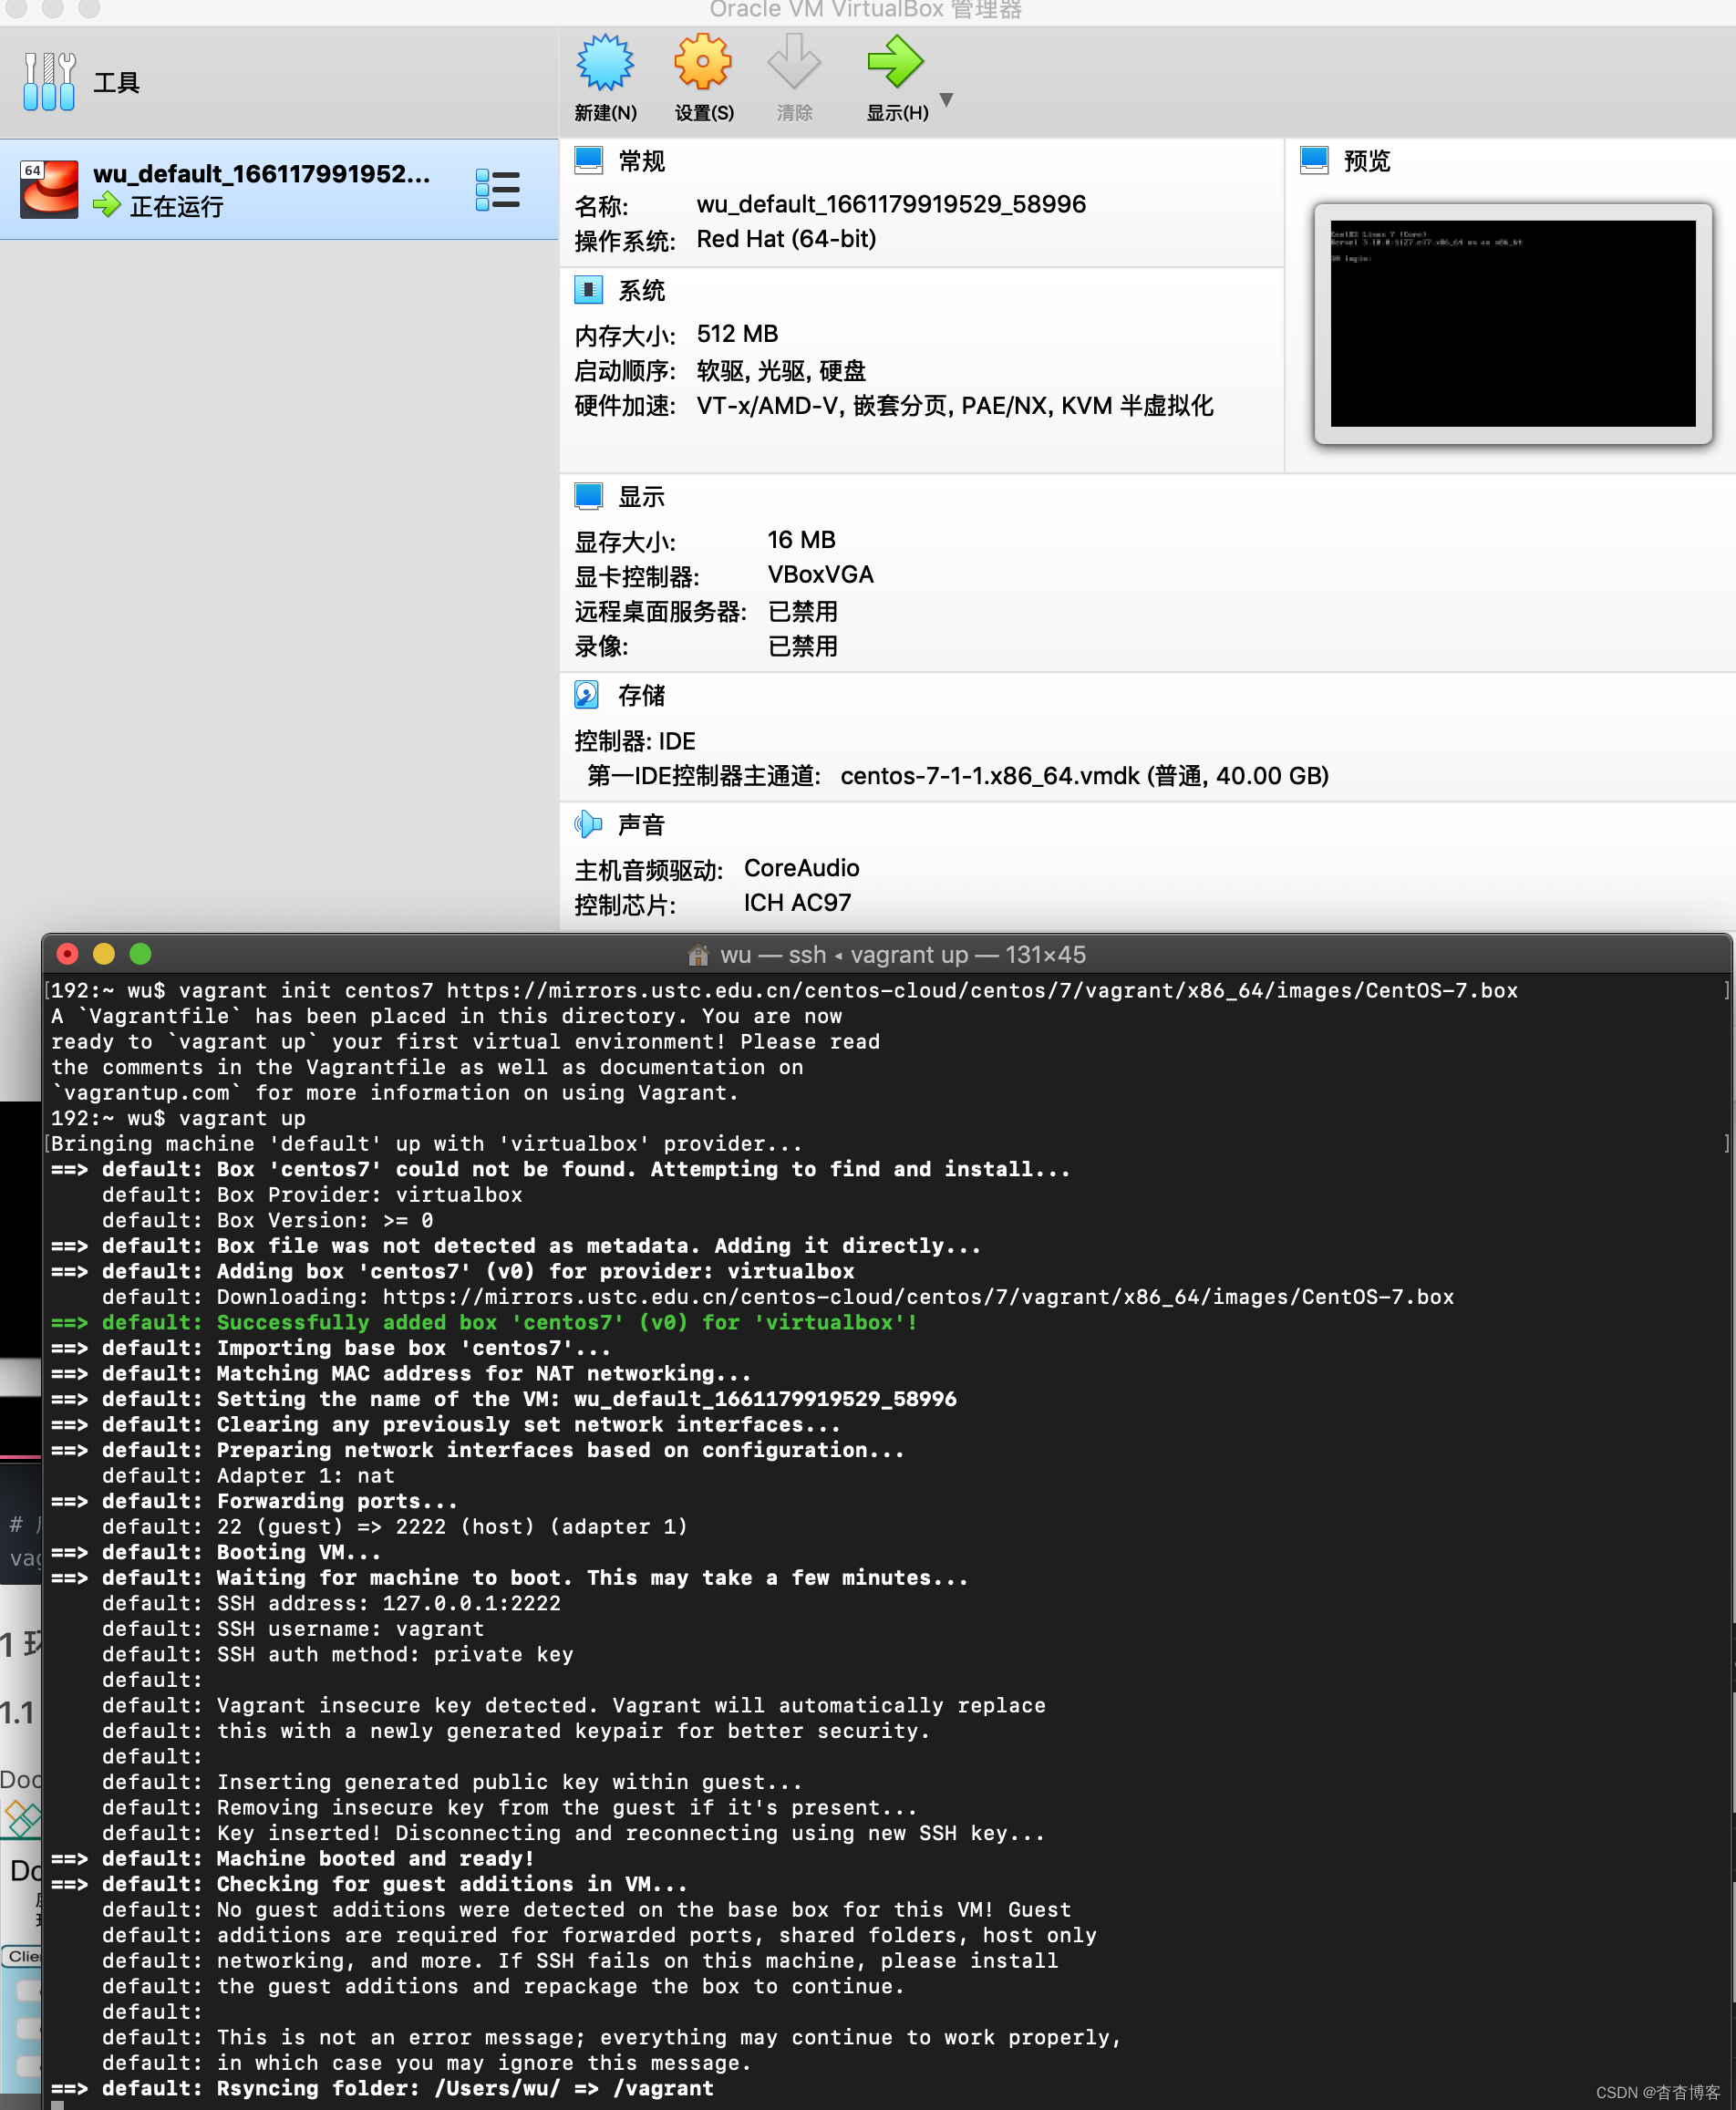
vagrant init centos7 https://mirrors.ustc.edu.cn/centos-cloud/centos/7/vagrant/x86_64/images/CentOS-7.Box
# 启动
vagrant up
1 环境搭建
1.1 安装docker
Docker安装文档:https://docs.docker.com/install/linux/docker-ce/centos/
1、卸载系统之前docker的旧版本,没有安装过可以跳过这步进行下一步
sudo yum remove docker \
                  docker-client \
                  docker-client-latest \
                  docker-common \
                  docker-latest \
                  docker-latest-logrotate \
                  docker-logrotate \
                  docker-engine

2  设置存储库--这里使用的是aliyun镜像,下载更快
sudo yum install -y yum-utils
sudo yum-config-manager \
    --add-repo \
    http://mirrors.aliyun.com/docker-ce/linux/centos/docker-ce.repo

3  安装DOCKER引擎
sudo yum install docker-ce docker-ce-cli containerd.io

4  启动Docker.
sudo systemctl start docker

5 配置镜像加速(一步一步执行)
sudo mkdir -p /etc/docker
sudo tee /etc/docker/daemon.json <<-'EOF'
{
  "registry-mirrors": ["https://4mzul3fc.mirror.aliyuncs.com"]
}
EOF
sudo systemctl daemon-reload
sudo systemctl restart docker

6 设置docker开机自启动
sudo systemctl enable docker
7 查看Docker虚拟机上下载有什么镜像
sudo docker images

1.2 安装MysqL
1 拉去MysqL镜像(版本号自定义)
sudo docker pull MysqL:8.0


2 启动MysqL容器  并添加映射
sudo docker run -p 3306:3306 --name指定容器名字
 -v目录挂载 -p指定端口映射  -e设置MysqL参数 -d后台运行

sudo docker run -p 3306:3306 --name MysqL \
  -v /mydata/MysqL/log:/var/log/MysqL \
  -v /mydata/MysqL/data:/var/lib/MysqL \
  -v /mydata/MysqL/conf:/etc/MysqL \
  -e MysqL_ROOT_PASSWORD=root \
  -d MysqL:5.7


3 切换root权限
su - root


4 进入MysqL容器
docker exec -it 容器名称|容器id bin/bash

docker exec -it MysqL /bin/bash


5 修改MysqL默认配置my.cnf
vi /mydata/MysqL/conf/my.cnf
################这是配置信息#################
[client]
default-character-set=utf8

[MysqL]
default-character-set=utf8

[MysqLd]
init_connet='SET collation_connection = utf8_unicode_ci'
init_connet='SET NAMES utf8'
character-set-server=utf8
collation-server=utf8_unicode_ci
skip-character-set-client-handshake
skip-name-resolve
################以上是配置信息#################
#获取初始密码
grep "password" /var/log/MysqLd.log
#登录数据库
MysqL -u root -p'你的密码'
#修改密码
ALTER USER 'root'@'localhost' IDENTIFIED BY '你的新密码';
#设置密码永不过期
ALTER USER 'root'@'localhost' PASSWORD EXPIRE NEVER;
#刷新系统权限表
flush privileges;
- 设置云服务外部权限访问
首先用下面的命令先进入MysqL这个数据库
use MysqL


如果是允许任何ip访问你的MysqL,就用下面的命令(一般云服务器访问MysqL使用这条命令)
grant all privileges on *.* to root@"%" identified by "你的密码";


如果是在自己电脑上的虚拟机的话允许本地访问,就用这条命令
grant all privileges on *.* to root@"localhost" identified by "你的密码";


完成之后一定一定记得刷新权限表
flush privileges;


#接着查询数据库用户的相关信息
select user,host from user;
1.3 安装redis
1 在docker hub搜索redis镜像
sudo docker search redis

2 拉取redis镜像到本地--不填写版本号,默认最新版
sudo docker pull redis:6.0.10

3 创建redis目录,并且在目录下touch redis.conf
mk di r -p /mydata/redis/conf
cd上面的目录下touch redis.conf

4 启动redis容器  并根据上面的目录添加映射(默认启动mydata/redis/data:/data \的配置文件,这里可以进行配置redis)

docker run -p 6379:6379 --name redis -v $mydata/redis/data:/data \
  -v $mydata/redis/conf/redis.conf:/etc/redis/redis.conf \
  -d redis redis-server /etc/redis/redis.conf

5  直接进去redis客户端。(直接启用redis是没有持久化的,等一些配置都是默认的)
docker exec -it redis redis-cli


6 想要Redis持久化,需要修改配置文件。创建并修改/usr/local/redis/redis.conf
在redis.conf中,输入修改一下代码,实现持久化 开启aof持久化
appendonly yes
以及bind 0.0.0.0 开启远程权限
修改完之后使用docker restart redis 进行重启Redis。
redis可视化官方软件(MacOS付费)RedisDesktopManager
MacOS可以使用AnotherRedisDesktopManager代替
GitHub 地址(开源):
https://github.com/qishibo/AnotherRedisDesktopManager
1.4 Maven配置
conf/setting.xml下配置
<!-- 配置阿里云镜像 -->

	<mirror>
		<id>nexus-aliyun</id>
		<mirrorOf>central</mirrorOf>
		<name>Nexus aliyun</name>
		<url>http://maven.aliyun.com/nexus/content/groups/public</url>
	</mirror>


<!-- 配置 jdk 1.8 编译项目-->

	<profile>
		<id>jdk-1.8</id>
		<activation>
			<activeByDefault>true</activeByDefault>
			<jdk>1.8</jdk>
		</activation>
		<properties>
			<maven.compiler.source>1.8</maven.compiler.source>
			<maven.compiler.target>1.8</maven.compiler.target>
			<maven.compiler.compilerVersion>1.8</maven.compiler.compilerVersion>
		</properties>
	</profile>
1.5 安装插件plugins(推荐安装)
----idea插件----

lombok
mybatisx
----cscode插件----

Auto Close Tag
Auto Rename Tag
Chinese
ESlint
HTML CSS Support
HTML Snippets
JavaScript (ES6) code snippets
Live Server
open in brower
Vetur
Vue 2 Snippets(安装Vue语法提示插件)
1.6 安装git
# 配置用户名
git config --global user.name "username"  //(名字,自定义)

# 配置邮箱
git config --global user.email "123456@qq.com" // 注册账号时使用的邮箱

# 配置ssh免密登录
ssh-keygen -t rsa -C "123456@qq.com"

# 三次回车后生成了密钥,也可以查看密钥
cat ~/.ssh/id_rsa.pub


# 使用浏览器登录码云后,个人头像上点设置、然后找到ssh公钥、标题随便填个,然后复制之前的ssh密钥
ssh-rsa xxxxxxxx123456@qq.com

# 测试,会提示是否:输入yes
ssh -T git@gitee.com

# 测试成功
Hi 杳杳! You've successfully authenticated, but GITEE.COM does not provide shell access.

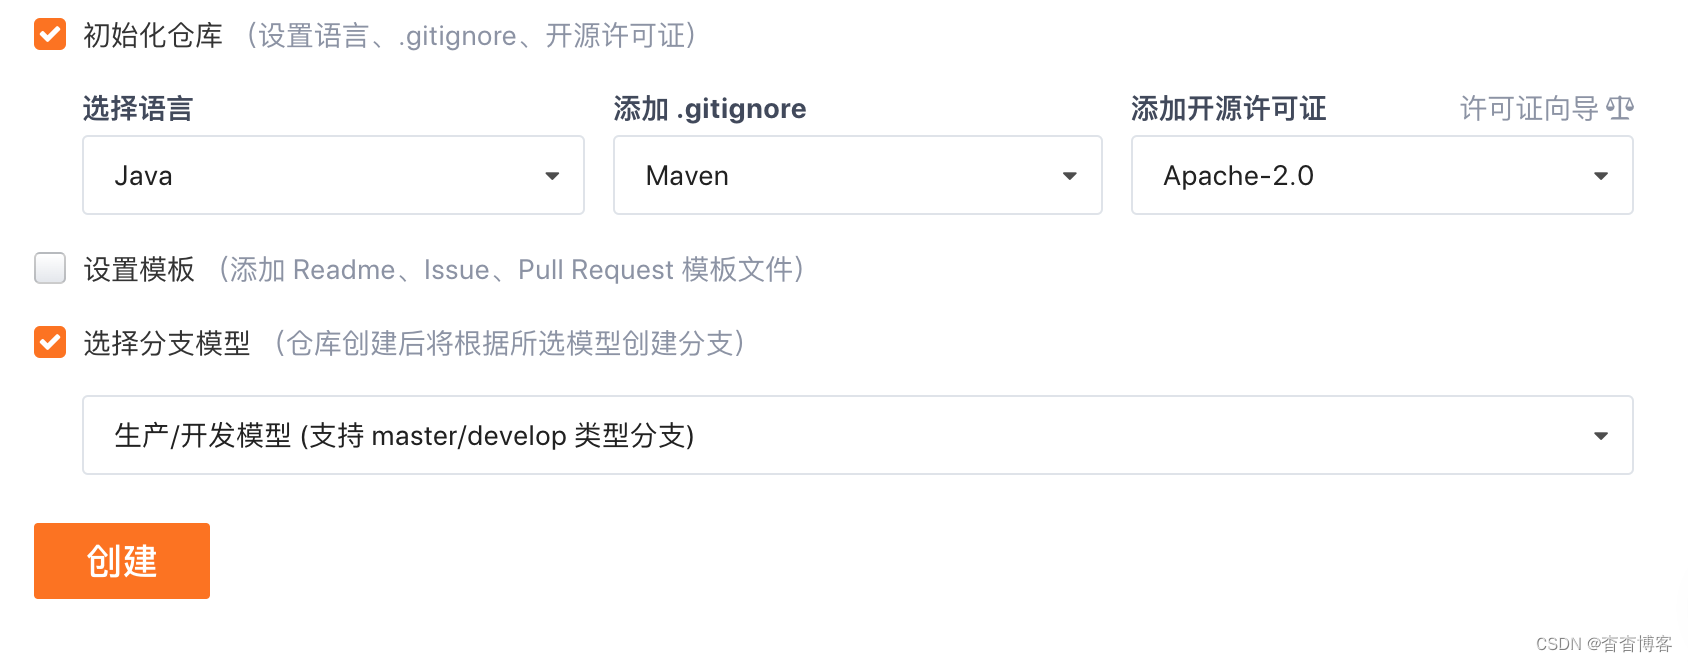
1.7 创建Gitee仓库
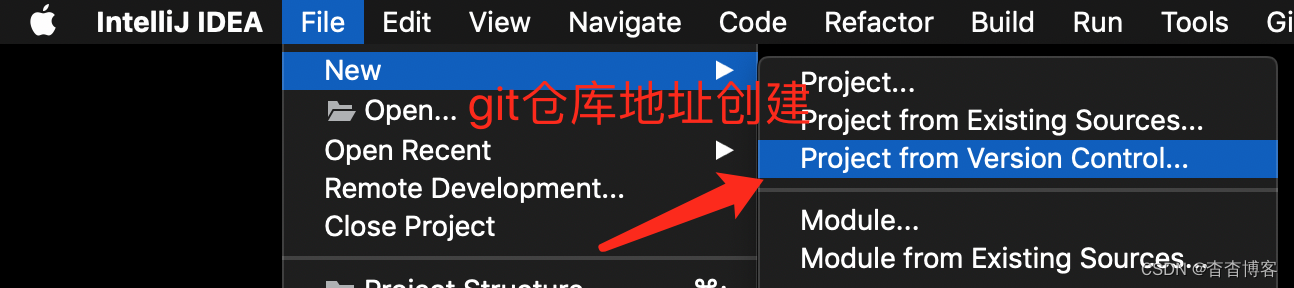
1.8 通过git仓库新建项目,并创建服务子模块

<?xml version="1.0" encoding="UTF-8"?>
<project xmlns="http://maven.apache.org/POM/4.0.0" xmlns:xsi="http://www.w3.org/2001/XMLSchema-instance"
         xsi:schemaLocation="http://maven.apache.org/POM/4.0.0 https://maven.apache.org/xsd/maven-4.0.0.xsd">
    <modelVersion>4.0.0</modelVersion>
    <groupId>com.atguigu.gulimall</groupId>
    <artifactId>gulimall</artifactId>
    <version>0.0.1-SNAPSHOT</version>
    <name>gulimall</name>
    <description>谷粒商城-聚合服务</description>
    <packaging>pom</packaging>

    <modules>
        <module>gulimall-coupon</module>
        <module>gulimall-member</module>
        <module>gulimall-order</module>
        <module>gulimall-product</module>
        <module>gulimall-ware</module>
    </modules>
</project>
1.9 创建数据库
- 创建数据库之前需要启动docker服务
# 这两个命令的差别就是后者会显示【已创建但没有启动的容器】
sudo docker ps
sudo docker ps -a


# 我们接下来设置我们要用的容器每次都是自动启动
sudo docker update redis --restart=always
sudo docker update MysqL --restart=always
1.10 VScode
npm install --registry=https://registry.npm.taobao.org
启动renren-generator时出现了循环依赖(我用的SpringCloud 2.7.3版本),过于复杂,没有深入解决。直接开启设置暂时快速解决
spring:
  main:
    allow-circular-references: true
1.11 逆向工程搭建
静态资源过滤问题:SpringCloud 2.6之后版本yml配置改变
# 之前
spring:
  resources:
    static-locations: classpath:/static/,classpath:/views/

# 2.6之后
spring
  web:
    resources:
      static-locations: classpath:/static/,classpath:/views/
- dao层: —> 公共模块common导入mybatis plus后dao层引用就解决了

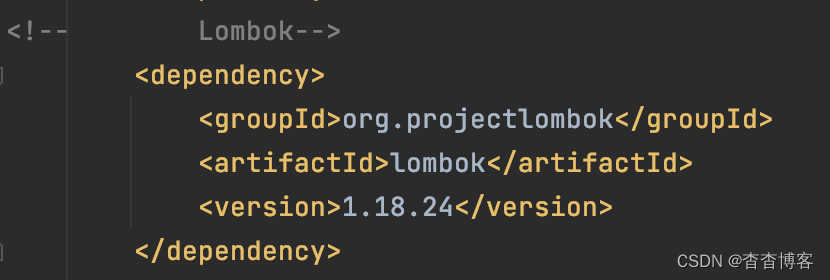
- 实体类entity: —> 公共模块common导入Lombok后实体类entity的@Data引用就解决了
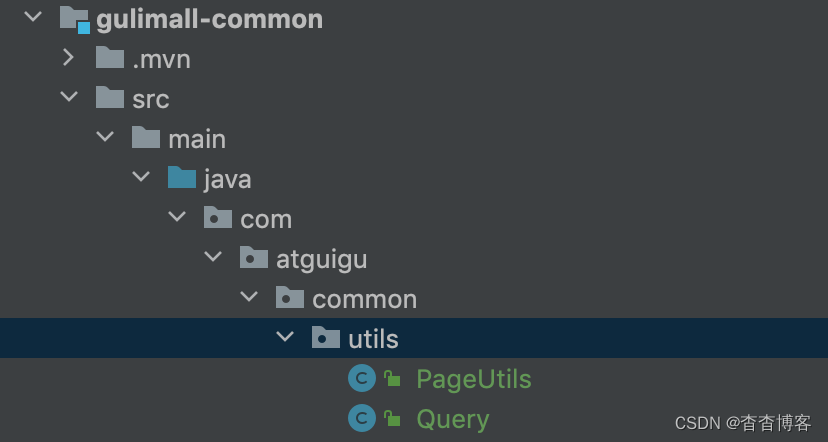
- service层: —> 公共模块common创建utils包,将renren-fast中utils包指定文件复制过来
- controller: —> 同service层导入R响应返回的映射类
- 导入的R类: —> R类中有apache下的HttpStatus
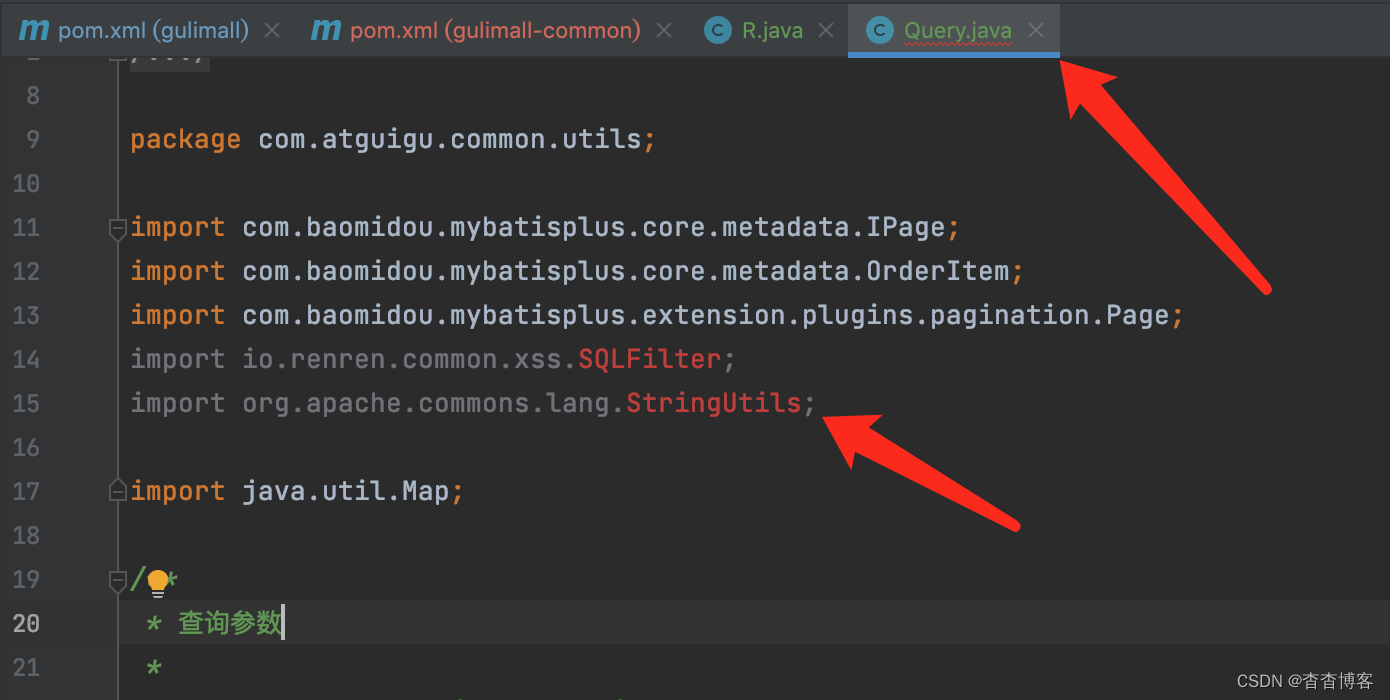
- 导入的Query类 : —> Query中有mybatis plus自己的包和依赖,复制过来;还有Constant等

注意:11000端口gulimall-ware启动报错原因是:实体类Longblob类型改成byte[]数组类型就可以
对于idea创建Spring项目时候start.spring.io是外网,太慢可以使用镜像
- https://start.spring.io/替换阿里国服官网https://start.spring.io/
- 阿里服
https://start.aliyun.com/ - Mybatis-plus官网
https://baomidou.com/
2 SpringCloud Alibaba概述
https://spring.io/projects/spring-cloud-alibaba#learn
2.1 SpringCloud Alibaba环境搭建
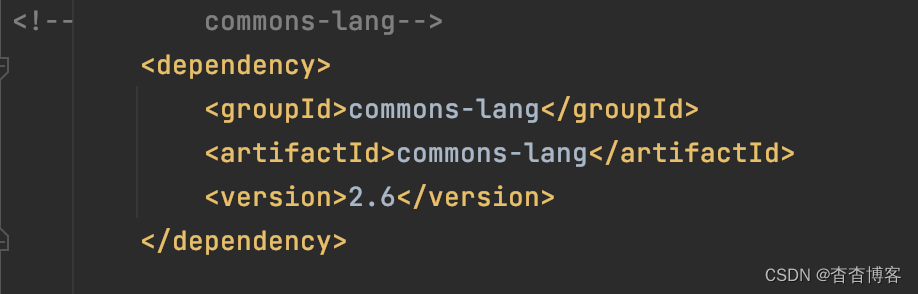
- 在公共模块common的pom.xml中加入
<!--	用dependencyManagement进行依赖管理 -->
	<dependencyManagement>
	     <dependencies>
	         <dependency>
	             <groupId>com.alibaba.cloud</groupId>
	             <artifactId>spring-cloud-alibaba-dependencies</artifactId>
	             <version>2.1.0.RELEASE</version>
	             <type>pom</type>
	             <scope>import</scope>
	         </dependency>
	     </dependencies>
	</dependencyManagement>
2.2 Nacos——服务注册中心和服务配置中心(动态管理平台)
2.2.1 Nacos服务注册发现
<!--		Nacos服务注册发现-->
		<dependency>
			<groupId>com.alibaba.cloud</groupId>
			<artifactId>spring-cloud-starter-alibaba-nacos-discovery</artifactId>
		</dependency>
spring:
  # 注册到 Nacos 地址上
  cloud:
    nacos:
      discovery:
        server-addr: 127.0.0.1:8848   # 填写Nacos运行在服务器的地址和端口号
        # 这里我们要在服务器中配置nacos,也就是注册中心。
        # 启动命令:startup.cmd -m standalone 这是单例模式启动,
        # 集群模式启动:在bin目录下startup.cmd 中 set MODE="standalone" 改成 set MODE="cluster"


  # 注册时的服务名称
  application:
    name: gulimall-coupon
package com.atguigu.gulimall.coupon;

import org.springframework.boot.SpringApplication;
import org.springframework.boot.autoconfigure.SpringBootApplication;
import org.springframework.cloud.client.discovery.EnablediscoveryClient;

@EnablediscoveryClient // nacos服务注册发现
@SpringBootApplication
public class GulimallCouponApplication {

	public static void main(String[] args) {
		SpringApplication.run(GulimallCouponApplication.class, args);
	}

}
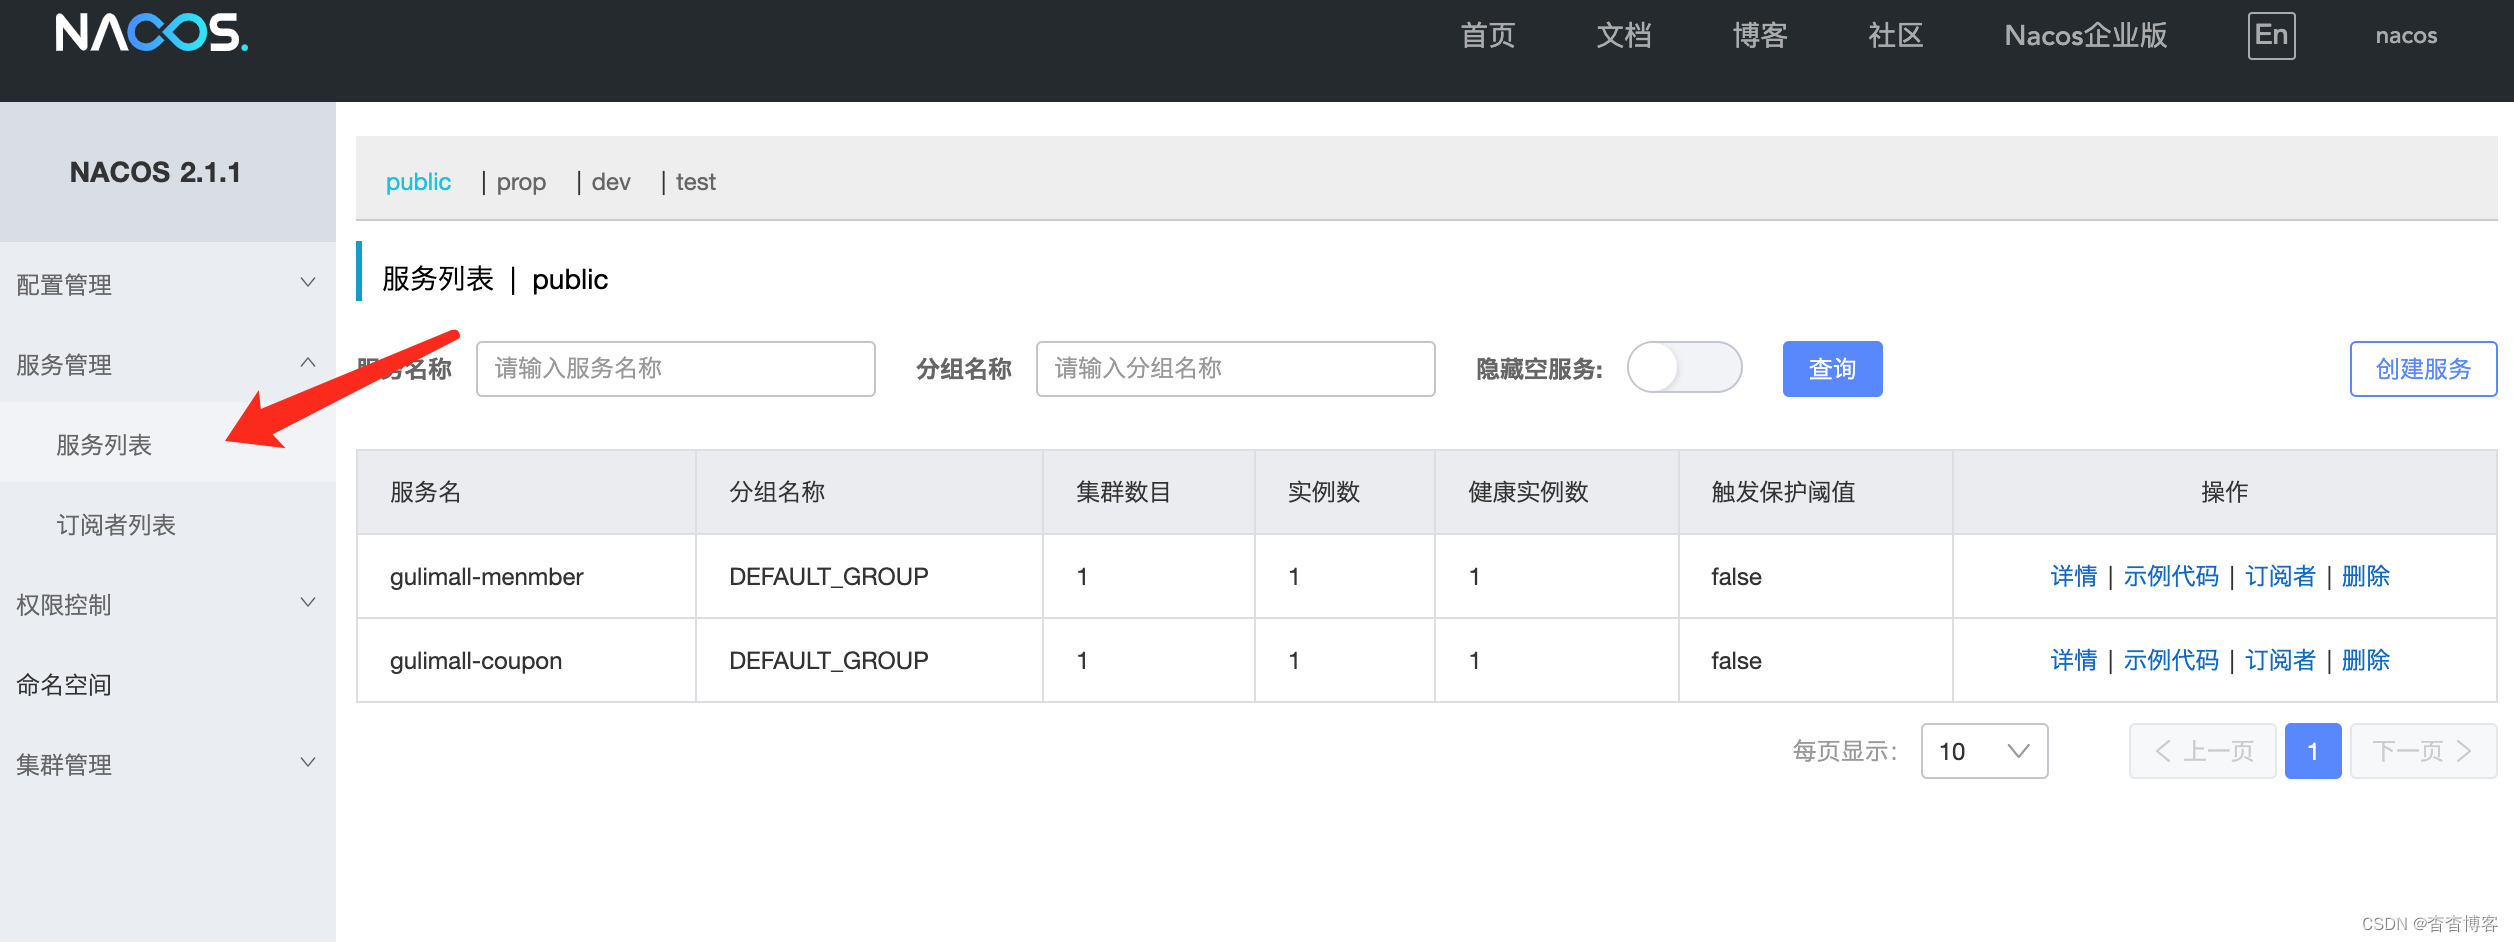
- 4 访问Nacos管理平台http://127.0.0.1:8848/nacos/ 账号密码均为nacos
2.2.2 如何使用Nacos作为配置中心统一管理配置
<!--		配置中心做配置管理-->
		<dependency>
			<groupId>com.alibaba.cloud</groupId>
			<artifactId>spring-cloud-starter-alibaba-nacos-config</artifactId>
		</dependency>
<!--		做bootstrap配置在2.6版本之后需要加依赖-->
		<dependency>
			<groupId>org.springframework.cloud</groupId>
			<artifactId>spring-cloud-starter-bootstrap</artifactId>
			<version>3.1.0</version>
		</dependency>
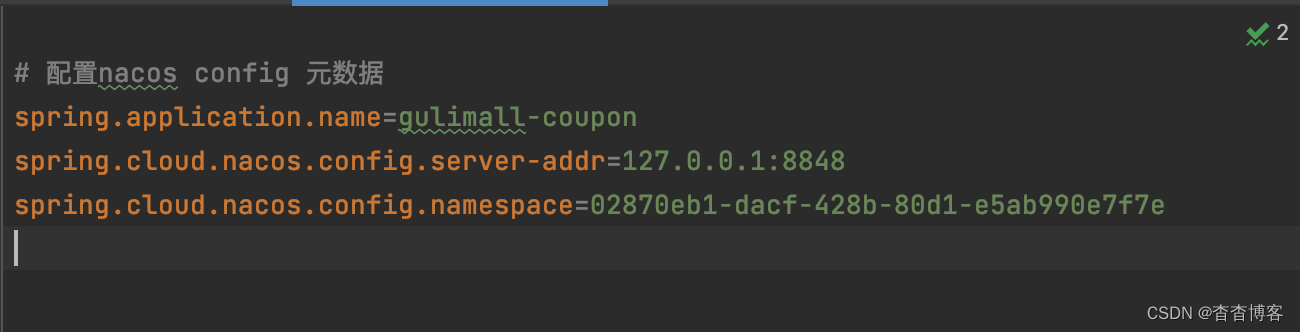
- 2 在微服务 coupons 模块中创建/src/main/resources/bootstrap.properties 配置文件,添加配置。他优先级别高于application.properties
# 配置nacos config 元数据
spring.application.name=gulimall-coupon
spring.cloud.nacos.config.server-addr=127.0.0.1:8848
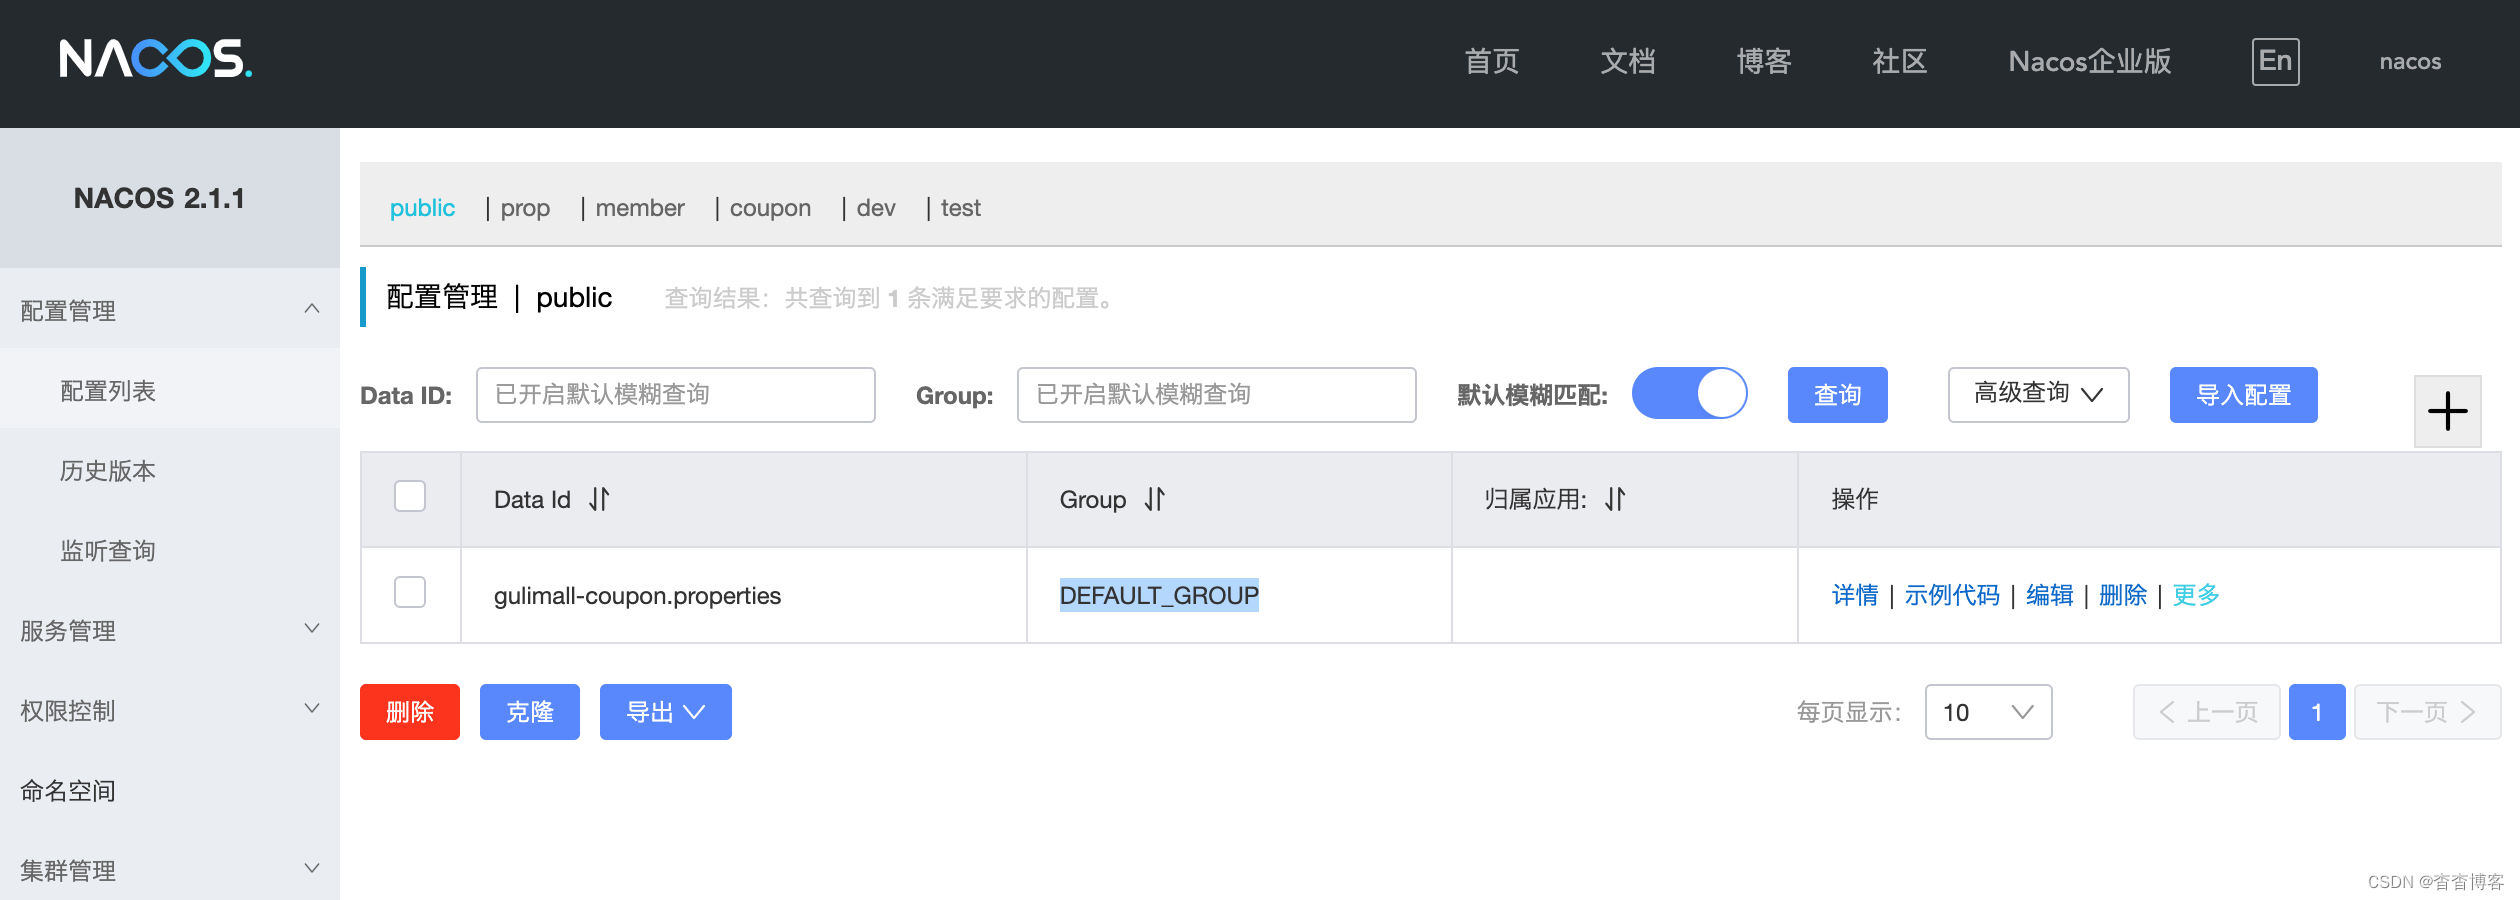
- 3 需要给配置中心默认添加一个叫 数据集(Data Id)gulimall-coupon.properties。默认规则,应用名.properties
- 4 给 应用名.properties添加任何配置
- 5 动态获取添加修改的配置(在controller中注解)
@RefreshScope—>动态添加
@Value(“${配置项的名}”)—>获取到配置
如果配置中心(Nacos)和当前微服务应用的配置文件都配置相同的项,则优先使用配置中心的配置
2.2.3 Nacos配置中心细节优化
- 命名空间:—>配置隔离
- 配置集:所有的配置集合叫配置集
- 配置集ID:类似文件名。(gulimall-coupon.properties)
Data ID:类似文件名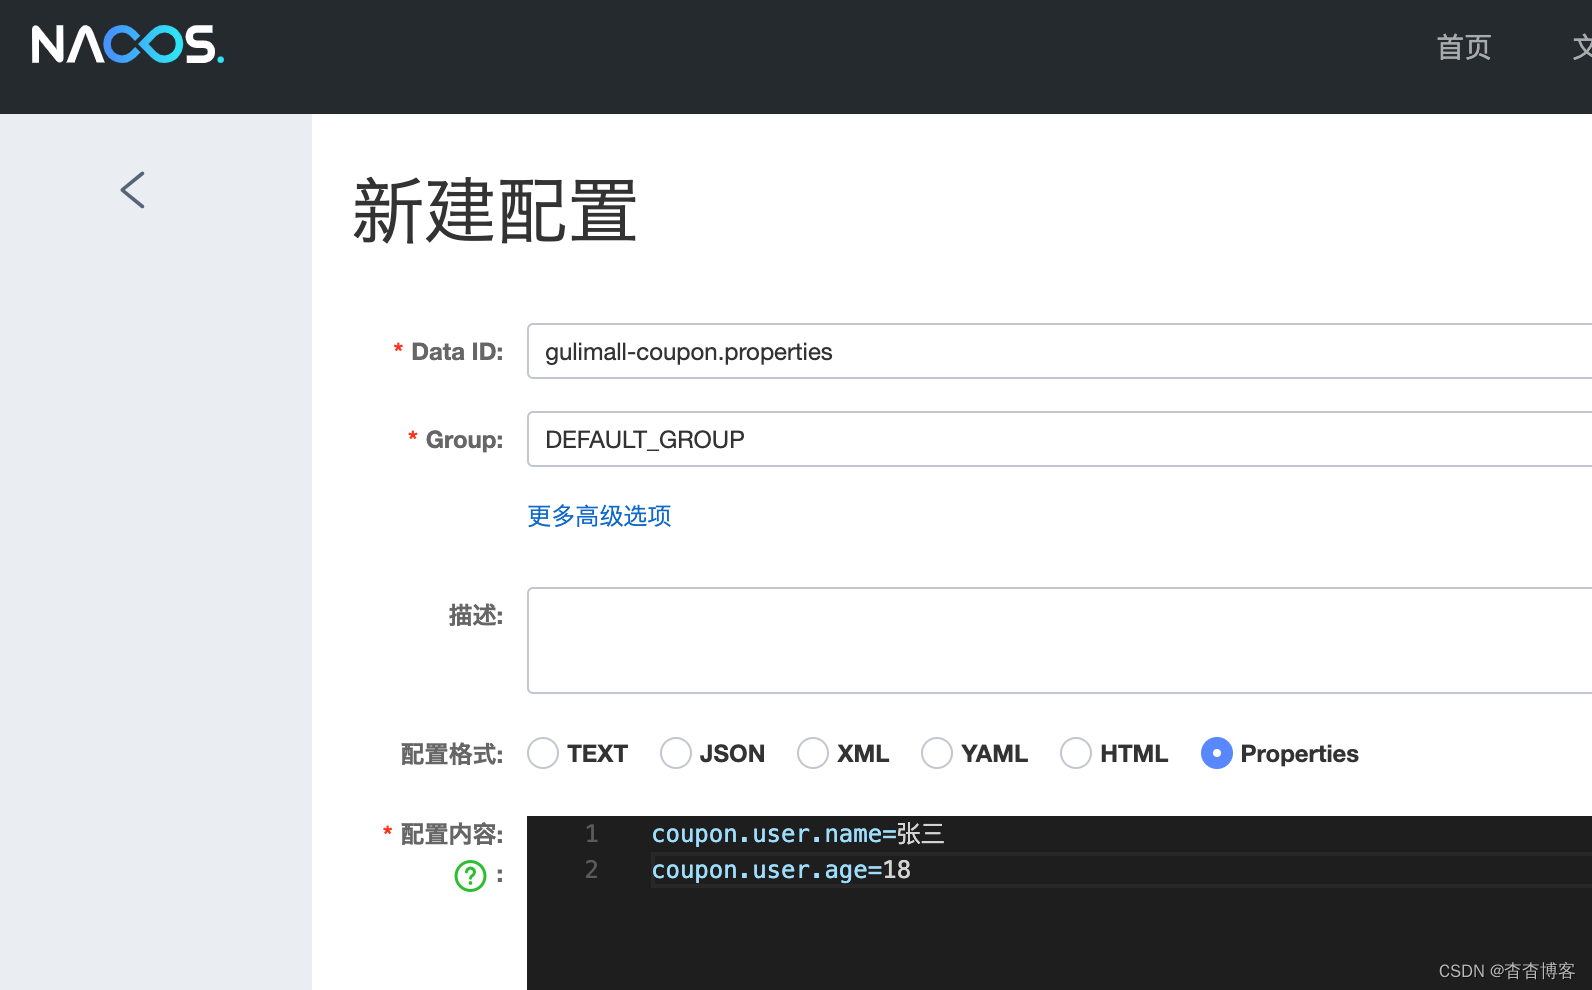
- 配置分组(group)
默认配置集都属于DEFAULT_GROUP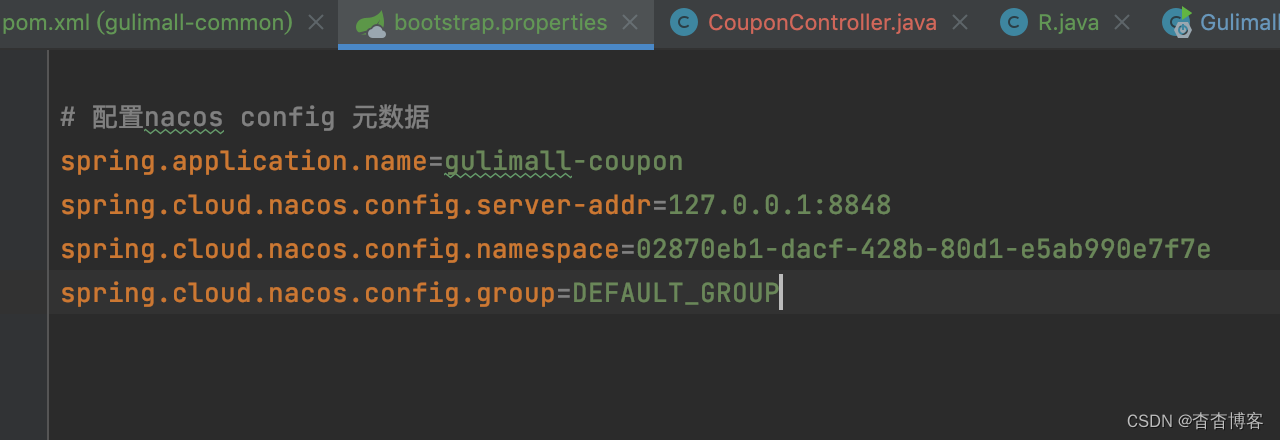

加载多配置集
# 加载多配置集
# 我们要把原来application.yml里的内容都分文件抽离出去。我们在nacos里创建好后,挨个添加并且关联,

# bootstrap.properties
spring.application.name=gulimall-coupon
spring.cloud.nacos.config.server-addr=192.168.11.1:8848


spring.cloud.nacos.config.namespace=ed042b3b-b7f3-4734-bdcb-0c516cb357d7  # # 可以选择对应的命名空间 ,即写上对应环境的命名空间ID
spring.cloud.nacos.config.group=dev  # 配置文件所在的组

spring.cloud.nacos.config.ext-config[0].data-id=datasource.yml
spring.cloud.nacos.config.ext-config[0].group=dev
spring.cloud.nacos.config.ext-config[0].refresh=true

spring.cloud.nacos.config.ext-config[1].data-id=mybatis.yml
spring.cloud.nacos.config.ext-config[1].group=dev
spring.cloud.nacos.config.ext-config[1].refresh=true

spring.cloud.nacos.config.ext-config[2].data-id=other.yml
spring.cloud.nacos.config.ext-config[2].group=dev
spring.cloud.nacos.config.ext-config[2].refresh=true


datasource.yml
spring:
  datasource:
    driver-class-name: com.MysqL.cj.jdbc.Driver
    url: jdbc:MysqL://192.168.1.103:3306/gulimall_sms?useUnicode=true&characterEncoding=UTF-8&useSSL=false&serverTimezone=Asia/Shanghai
    username: root
    password: root

mybatis.yml
mybatis-plus:
  mapper-locations: classpath:/mapper/**/*.xml
  global-config:
    db-config:
      id-type: auto

other.yml
spring:
  application:
    name: gulimall-coupon
  cloud:
    nacos:
      discovery:
        server-addr: 192.168.11.1:8848

server:
  port: 7000
2.3 API网关——路由、过滤、限流、监控等(解决统一的功能)
https://docs.spring.io/spring-cloud-gateway/docs/current/reference/html/#glossary
2.3.1 网关前言
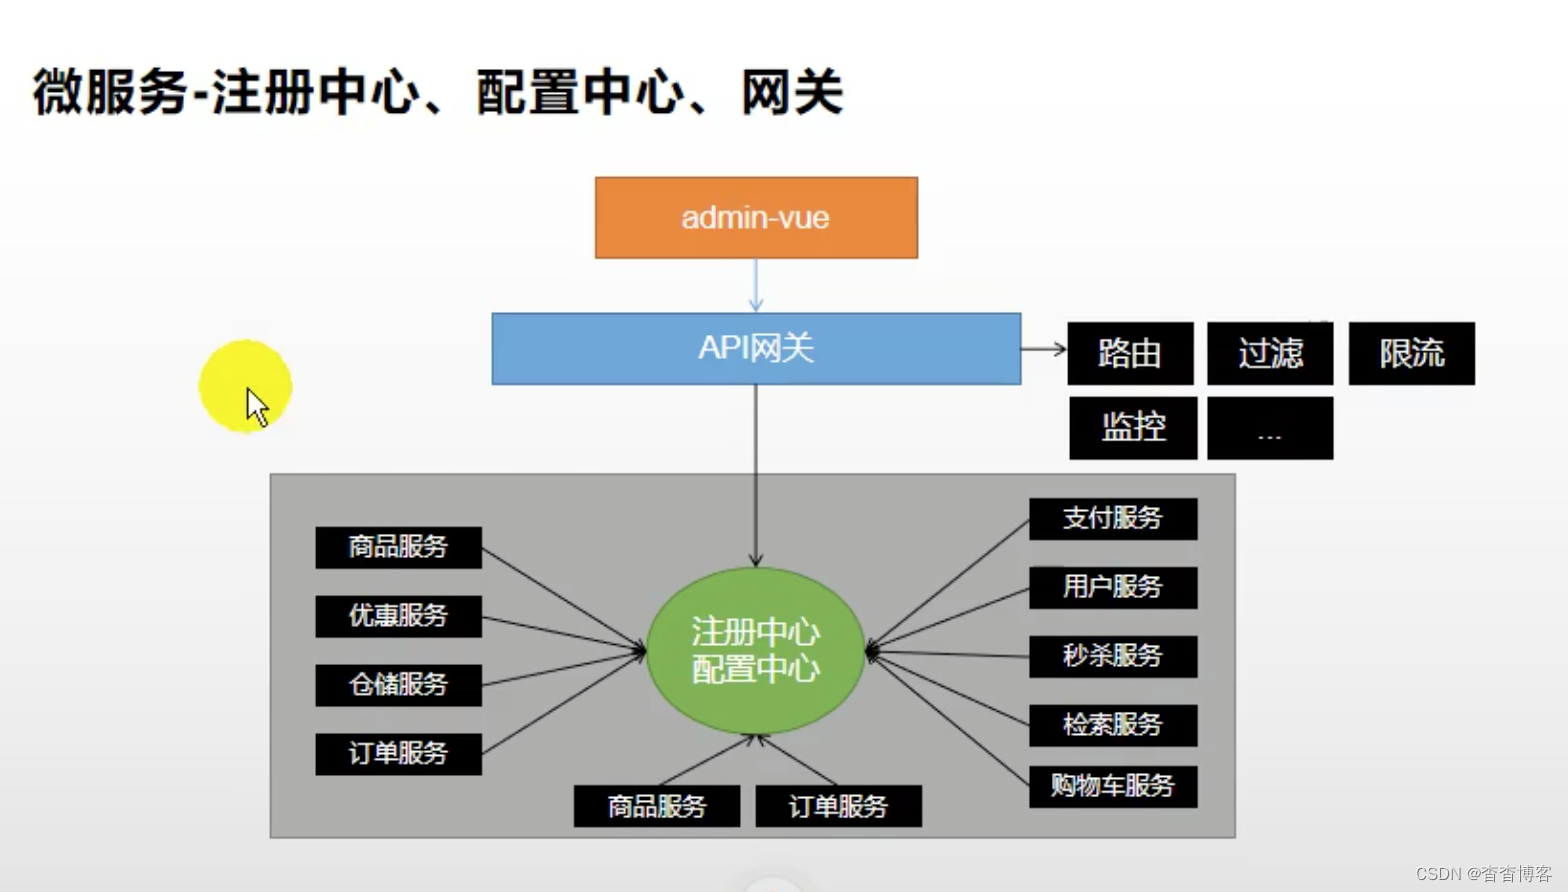
- 发送请求需要知道商品服务的地址,但如果商品服务器有100服务器,1号掉线后,
还得改,所以需要网关动态地切换、管理;他能路由各个服务、以及从注册中心中实时地感知某个服务上线还是下线等。。。 - 请求也要加上询问权限、限流、日志输出,需要网关。
- 所以我们使用 SpringCloud 的 Gateway组件做网关功能。(以前使用是Zuul)
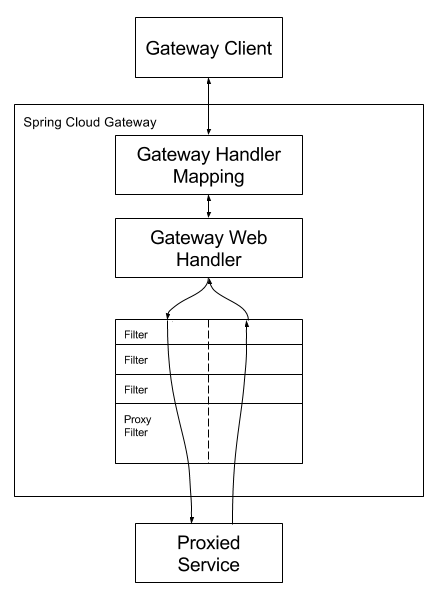
2.3.2 网关基本概念
- Route(路由):网关的基本构建块。它由 ID、目标 URI、Predicate集合和Filter集合定义。如果aggregate 断言为真,则匹配路由。
- Predicate(断言:就是判断):这是一个Java 8 Function Predicate。输入类型是Spring Framework ServerWebExchange。这使您可以匹配来自 HTTP 请求的任何内容,例如标头或参数。
- Filter(过滤器):这些是使用特定工厂构建的实例。在这里,您可以在发送下游请求之前或之后修改请求和响应。
- Gateway工作原理
2.3.3 网关
<dependency>
            <groupId>com.atguigu.gulimall</groupId>
            <artifactId>gulimall-common</artifactId>
            <version>0.0.1-SNAPSHOT</version>
</dependency>
3 前端
ES6
- let声明变量
Vue
# npm先初始化
npm init -y
# 安装Vue
# 这个安装没有vue.js文件
npm install vue --registry=https://registry.npm.taobao.org
# 换成下面这个
npm install vue@2 --registry=https://registry.npm.taobao.org

<!-- 导入vue -->
    <script src="./node_modules/vue/dist/vue.js"></script>
指令:
v-text、v-html
v-bind :简写成:
v-model
双向绑定
v-on:简写成@
事件
v-for
v-if、v-show
v-else、v-else-if
原文地址:https://www.jb51.cc/wenti/3280764.html
版权声明:本文内容由互联网用户自发贡献,该文观点与技术仅代表作者本人。本站仅提供信息存储空间服务,不拥有所有权,不承担相关法律责任。如发现本站有涉嫌侵权/违法违规的内容, 请发送邮件至 dio@foxmail.com 举报,一经查实,本站将立刻删除。

