

前言
本文介绍的网络可以理解为SSD目标检测的简化版本,可以让我们很好的入门。
一、数据集VOC2012
1.数据处理
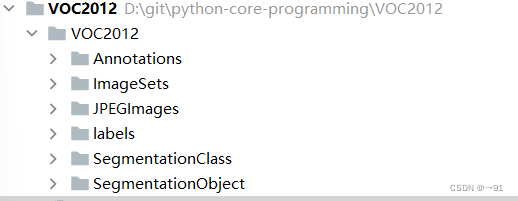
使用数据集合VOC2012。
解压数据集合后,需要对数据集合进行处理,将图像的xml文件转换为目标检测的label文件(txt),其中包含物体的类别,bBox的左上角点坐标以及bBox的宽、高,并将四个物理量归一化。
classes = ['person', 'bird', 'cat', 'cow', 'dog', 'horse', 'sheep', 'aeroplane', 'bicycle', 'boat', 'bus', 'car', 'motorbike', 'train', 'bottle', 'chair', 'dining table', 'potted plant', 'sofa', 'tvmonitor']
# 类别名
DATASET_PATH = './VOC2012/'
# 数据集根目录

def convert(size, Box):
    """将bBox的左上角点、右下角点坐标的格式,转换为bBox中心点+bBox的w,h的格式
    并进行归一化"""
    dw = 1. / size[0]
    dh = 1. / size[1]
    x = (Box[0] + Box[1]) / 2.0
    y = (Box[2] + Box[3]) / 2.0
    w = Box[1] - Box[0]
    h = Box[3] - Box[2]
    x = x * dw
    w = w * dw
    y = y * dh
    h = h * dh
    return x, y, w, h

def convert_annotation(image_index):
    """把图像image_id的xml文件转换为目标检测的label文件(txt)
    其中包含物体的类别,bBox的左上角点坐标以及bBox的宽、高
    并将四个物理量归一化"""
    f = open(DATASET_PATH + 'Annotations/%s' %(image_index))
    image_name = image_index.split('.')[0]
    out_file = open('./VOC2012/labels/%s.txt' %(image_name), 'w')
    tree = ET.parse(f)
    root = tree.getroot()
    size = root.find('size')
    w = int(size.find('width').text)
    h = int(size.find('height').text)

    for obj in root.iter('object'):
        difficult = obj.find('difficult').text
        cls = obj.find('name').text
        if cls not in classes or int(difficult) == 1:
            continue
        cls_id = classes.index(cls)
        xmlBox = obj.find('bndBox')
        points = (float(xmlBox.find('xmin').text), float(xmlBox.find('xmax').text), float(xmlBox.find('ymin').text), float(xmlBox.find('ymax').text))
        bndBox = convert((w, h), points)
        out_file.write(str(cls_id) + ' ' + ' '.join([str(a) for a in bndBox]) + '\n')


def make_label_txt():
    """在labels文件夹下创建image_id.txt,对应每个image_id.xml提取出的bBox信息"""
    filenames = os.listdir(DATASET_PATH + 'Annotations')
    for file in filenames:
        convert_annotation(file)
运行make_label_txt函数最终得到label文件夹。
2.构建dataset
class VOC2012(Dataset):
    def __init__(self, is_train=True, is_aug=True):
        if is_train:
            self.filenames = list(pd.read_csv(DATASET_PATH + 'imagesets/Main/train.txt', names=['filenames']).values.reshape(-1))
        else:
            self.filenames = list(pd.read_csv(DATASET_PATH + 'imagesets/Main/val.txt', names=['filenames']).values.reshape(-1))
        self.image_path = DATASET_PATH + 'JPEGImages/'
        self.label_path = DATASET_PATH + 'labels/'
        self.is_aug = is_aug


    def __len__(self):
        return len(self.filenames)


    def __getitem__(self, item):
        image = cv2.imread(self.image_path + self.filenames[item] + '.jpg')
        h, w = image.shape[0:2]
        image = cv2.resize(image, (224, 224))
        if self.is_aug:
            aug = transforms.Compose([
                transforms.ToTensor()
            ])
            image = aug(image)
        bBox = pd.read_csv(self.label_path + self.filenames[item] + '.txt', names=['labels', 'x', 'y', 'w', 'h'], sep=' ').values
        if bBox.dtype == 'float64':
            bBox = torch.tensor(bBox, dtype=torch.float64)
            label = bBox[:, 0].reshape(-1, 1)
            bBox = Box_center_to_corner(bBox[:, 1:])
            bBox = torch.cat((label, bBox), dim=1)
        return image, bBox


    def collate_fn(self, batch):
        images = list()
        Boxes = list()
        for b in batch:
            if b[1].dtype == torch.float64:
                images.append(b[0])
                Boxes.append(b[1])
        images = torch.stack(images, dim=0)
        return images, Boxes
注意:这里实现了collate_fn(self, batch)对数据的批次化处理,并对数据进行了一个简单的过滤(因为数据中存在空文件)。
3.构建DataLoader
train_data = VOC2012(True)
train_loader = DataLoader(train_data, batch_size=64, shuffle=True, num_workers=2, collate_fn=train_data.collate_fn)
# 注意加入参数collate_fn
二、网络结构
class VGGBase(nn.Module):
    def __init__(self):
        super(VGGBase, self).__init__()
        model_conv = models.vgg16(weights=models.VGG16_Weights.IMAGENET1K_V1)
        model_conv = nn.Sequential(*list(model_conv.children())[:-2])
        self.cnn = model_conv

    def forward(self, img):
        return self.cnn(img)

class PredictionConvolutions(nn.Module):
    def __init__(self, n_classes):
        super(PredictionConvolutions, self).__init__()
        self.n_classes = n_classes
        n_Boxes = 5
        self.loc_conv = nn.Conv2d(512, n_Boxes * 4, kernel_size=3, padding=1)
        self.cl_conv = nn.Conv2d(512, n_Boxes * n_classes, kernel_size=3, padding=1)
        self.init_conv2d()

    def init_conv2d(self):
        for c in self.children():
            if isinstance(c, nn.Conv2d):
                nn.init.xavier_uniform_(c.weight)
                nn.init.constant_(c.bias, 0.)

    def forward(self, pool5_feats):
        batch_size = pool5_feats.size(0)
        l_conv = self.loc_conv(pool5_feats)
        l_conv = l_conv.permute(0, 2, 3, 1).contiguous()
        locs = l_conv.view(batch_size, -1, 4)
        c_conv = self.cl_conv(pool5_feats)
        c_conv = c_conv.permute(0, 2, 3, 1).contiguous()
        classes_scores = c_conv.view(batch_size, -1, self.n_classes)
        return locs, classes_scores

class SSD(nn.Module):
    def __init__(self, num_classes):
        super(SSD, self).__init__()
        self.num_classes = num_classes
        self.base = VGGBase()
        self.pred_convs = PredictionConvolutions(num_classes)
        self.sizes =[0.75, 0.5, 0.25]
        self.ratios = [1, 2, 0.5]

    def forward(self, image):
        image = self.base(image)
        anchors = multiBox_prior(image, self.sizes, self.ratios)
        locs, classes_scores = self.pred_convs(image)
        locs = locs.reshape(locs.shape[0], -1)
        return anchors, locs, classes_scores
网络输入一个224*224的图像,采用vgg16提取特征得到7 * 7的特征图。接着在7 * 7的特征图的每个像素点上设置锚框或者说先验框,先验框的尺寸和宽高比为sizes =[0.75, 0.5, 0.25],ratios = [1, 2, 0.5],为了简化先验框我们只使用包含sizes[0]和ratios[0]的先验框。对于每个anchor,我们需要预测两类信息,一个是这个anchor的类别信息,一个是物体的边界框信息。类别信息由21类别的得分组成(VOC数据集的20个类别 + 一个背景类),模型最终会选择预测得分最高的类作为边界框对象的类别。而边界框信息是指,我们预测出了先验框的偏移信息,对anchor进行微调,使得最终能够准确预测出物体的bBox。在7x7的feature map后,接上两个3x3的卷积层,即可分别完成分类和回归的预测。
三、损失函数
为了简化过程我们,使用交叉熵损失和L1损失来分别计算分类和回归的损失,并将其封装为函数。
cls_loss = nn.CrossEntropyLoss(reduction='none')
bBox_loss = nn.L1Loss(reduction='none')
def calc_loss(cls_preds, cls_labels, bBox_preds, bBox_labels, bBox_masks):
    batch_size, num_classes = cls_preds.shape[0], cls_preds.shape[2]
    cls = cls_loss(cls_preds.reshape(-1, num_classes), cls_labels.reshape(-1)).reshape(batch_size, -1).mean(dim=1)
    bBox = bBox_loss(bBox_preds * bBox_masks, bBox_labels * bBox_masks).mean(dim=1)
    return cls + bBox * 1000
注意:因为先验框信息做了归一化处理,为了方便观察,这里bBox*1000。
四、训练与预测
目标检测网络的训练大致是如下的流程:
- 设置各种超参数
- 定义数据加载模块 DataLoader
- 定义网络 model
- 定义损失函数 loss
- 定义优化器 optimizer
- 遍历训练数据,预测-计算loss-反向传播
1.训练
def train(train_loader, model, criterion, optimizer, epoch):
    model.train()
    losses = 0.0
    for i, (images, Boxes) in enumerate(train_loader):
        images = images.cuda()
        anchors, predicted_locs, predicted_scores = model(images)
        bBox_labels, bBox_masks, cls_labels = multiBox_target(anchors, Boxes)
        optimizer.zero_grad()
        l = calc_loss(predicted_scores, cls_labels, predicted_locs, bBox_labels, bBox_masks).mean()
        l.backward()
        optimizer.step()
        if i % 10 == 0:
            print(f'epoch:{epoch} loss{l.item()}')
        losses += l.item()
    return losses / len(train_loader)
model = SSD(21)
model = model.cuda()
optimizer = optim.Adam(model.parameters(), lr=1e-4)
train_loss = []
for epoch in range(1):
    loss = train(train_loader, model, calc_loss, optimizer, epoch)
    train_loss.append(loss)
print(train_loss)
torch.save(model.state_dict(), './model.pth')
我们这里做了100轮次的训练,

2.预测
### 预测
model_predict = SSD(21)
model_predict.load_state_dict(torch.load('./model.pth'))
model_predict = model_predict.cuda()
def predict(image, model):
model.eval()
anchors, bBox_preds, cls_preds = model(image.cuda())
cls_probs = F.softmax(cls_preds, dim=2).permute(0, 2, 1)
output = multiBox_detection(cls_probs, bBox_preds, anchors)
idx = [i for i, row in enumerate(output[0]) if row[0] != -1]
return output[0, idx]
def display(image, output, threshold):
fig = plt.imshow(image.permute(1, 2, 0).numpy()[:, :, ::-1])
for row in output:
score = float(row[1])
predict_label = int(row[0])
score_class = classes[predict_label] + ':' + str(score)
if score < threshold:
continue
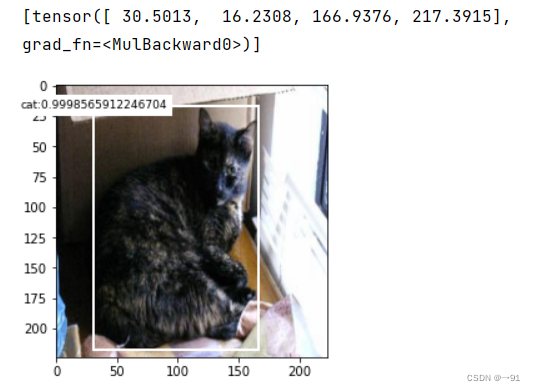
bBox = [row[2:6] * torch.tensor((224, 224, 224, 224), device=row.device)]
print(bBox)
show_bBoxes(fig.axes, bBox, score_class, 'w')
image, label = next(iter(train_loader))
output = predict(image[0].unsqueeze(0), model_predict)
display(image[0], output.cpu(), threshold=0.9)
打印一下真实标签作为对比。
print(label[0][:, 1:] * torch.tensor([224, 224, 224, 224]))
fig = plt.imshow(image[0].permute(1, 2, 0).numpy()[:, :, ::-1])
# show_bBoxes(fig.axes, label[0] * torch.tensor([224]), [1, 1, 1], 'w')
true_label = [classes[int(i)] for i in label[0][:, 0]]
show_bBoxes(fig.axes, label[0][:, 1:] * torch.tensor((224, 224, 224, 224)), true_label)

总结
我们的网络,预测效果还是不错的,但对于小物体,较为密集的物体的检测存在明显的问题,可以使用真实的SSD来解决这个问题,另外我们固定了图像的尺寸为224 * 224,可以采取更大的图像输入。
原文地址:https://www.jb51.cc/wenti/3281799.html
版权声明:本文内容由互联网用户自发贡献,该文观点与技术仅代表作者本人。本站仅提供信息存储空间服务,不拥有所有权,不承担相关法律责任。如发现本站有涉嫌侵权/违法违规的内容, 请发送邮件至 dio@foxmail.com 举报,一经查实,本站将立刻删除。

