

文章目录
SpringBoot(约定大于配置)
工具
jdk
maven
springboot
idea
[外链图片转存失败,源站可能有防盗链机制,建议将图片保存下来直接上传(img-gWat4CBD-1661318637409)(C:\Users\28908\AppData\Roaming\Typora\typora-user-images\image-20220719102903934.png)]
这些都是没用的
启动springboot
[外链图片转存失败,源站可能有防盗链机制,建议将图片保存下来直接上传(img-Dqe6xBTb-1661318637413)(C:\Users\28908\AppData\Roaming\Typora\typora-user-images\image-20220720141827691.png)]
要在主方法里,不要在单元测试里
配置修改
- 端口修改
#更改端口号
server.port=8080
- 修改控制台打印图
[外链图片转存失败,源站可能有防盗链机制,建议将图片保存下来直接上传(img-GqoZ7iXR-1661318637414)(C:\Users\28908\AppData\Roaming\Typora\typora-user-images\image-20220719145517466.png)]
[外链图片转存失败,源站可能有防盗链机制,建议将图片保存下来直接上传(img-zVAUBXTr-1661318637415)(C:\Users\28908\AppData\Roaming\Typora\typora-user-images\image-20220719145539406.png)]
在resource下新建banner.txt 把图放进去就可以了
pom.xml核心依赖
插件安装失败----->install一下 在右侧maven下
我们在写或者引入一些springboot依赖的时候,不需要指定版本,因为有这些版本库
- 启动器
说白了就是springboot的启动场景;
比如spring-boot-starter-web自动导入web环境所有的依赖
我们要使用什么功能就只需要找到对应的启动器就可以了
<dependency>
        <groupId>org.springframework.boot</groupId>
        <artifactId>spring-boot-starter</artifactId>
</dependency>
@SpringBootConfiguration   spring boot的配置
    @COnfiguration   spring配置类
    @Component    说明这是一个spring的组件、、


@EnableAutoConfiguration    自动配置
    @AutoConfigurationPackage    自动配置包
    @Import({Registrar.class})    导入选择器
结论:
[外链图片转存失败,源站可能有防盗链机制,建议将图片保存下来直接上传(img-vCCV2U4U-1661318637416)(C:\Users\28908\AppData\Roaming\Typora\typora-user-images\image-20220719154550847.png)]
[外链图片转存失败,源站可能有防盗链机制,建议将图片保存下来直接上传(img-w38rba84-1661318637417)(C:\Users\28908\AppData\Roaming\Typora\typora-user-images\image-20220719161714112.png)]
springboot配置
[外链图片转存失败,源站可能有防盗链机制,建议将图片保存下来直接上传(img-dPUTv6PY-1661318637418)(C:\Users\28908\AppData\Roaming\Typora\typora-user-images\image-20220719162514026.png)]
[外链图片转存失败,源站可能有防盗链机制,建议将图片保存下来直接上传(img-QdzGWJOV-1661318637418)(C:\Users\28908\AppData\Roaming\Typora\typora-user-images\image-20220719162739049.png)]
两者区别:
[外链图片转存失败,源站可能有防盗链机制,建议将图片保存下来直接上传(img-QE2HXn9B-1661318637419)(C:\Users\28908\AppData\Roaming\Typora\typora-user-images\image-20220719163218221.png)]
yaml里还可以行内写法(对空格要求极为严格)
student: {name:zy,age:3}

#数组
pets:
	- cat
	- dog
	- pig
pets: [cat,dog,pig]
yaml可以给实体类赋值
一些注释功能
@Autowired(自动装配到类那里,取到类的值)
[外链图片转存失败,源站可能有防盗链机制,建议将图片保存下来直接上传(img-X67Tw2mu-1661318637419)(C:\Users\28908\AppData\Roaming\Typora\typora-user-images\image-20220719165534716.png)]
@Value
@Value("修狗")
private String name;
@Value("3")
private Integer age;
yaml可以保存对象,用yaml关联类的对象
使用@ConfigurationProperties(prefix=“person”)
#yaml
person:
  name: 张钰
  age: 4
  happy: true
  birth: 2000/05/02
  maps: {k:1,v:2}
  list:
    - code
    - music
    - girl

zy:
  name: 张钰
  age: 3
@Component
@ConfigurationProperties(prefix="person")
public class Person {
    private String name;
    private Integer age;
    private Boolean happy;
    private Date birth;
    private Map<String,Object> maps;
    private List<Object> lists;
Test类
    @SpringBoottest
class Demo2ApplicationTests {

//    自动装配
    @Autowired
    private Person p;

    @Test
    void contextLoads() {
        System.out.println(p);
    }

}
打印结果:
Person{name=‘张钰’, age=4, happy=true, birth=Tue May 02 00:00:00 CST 2000, maps={k1=, v2=}, lists=null, zy=null}
注意:
[外链图片转存失败,源站可能有防盗链机制,建议将图片保存下来直接上传(img-6EVXyj2p-1661318637420)(C:\Users\28908\AppData\Roaming\Typora\typora-user-images\image-20220719173346458.png)]
①:k:冒号后面要空格
②:person下的名字要和Person类里定义的变量名相同
③:需要重写get/set方法,打印的话需要toString方法
④:要用注释@ConfigurationProperties(prefix=“person”)
⑤:person实例化时要写上注释 @Autowired自动装配
@PropertySource(value = “xxx”)加载指定(名字不是application.properties)的配置文件
表达式SPEL取出配置文件的值
[外链图片转存失败,源站可能有防盗链机制,建议将图片保存下来直接上传(img-ZSdhXtiz-1661318637420)(C:\Users\28908\AppData\Roaming\Typora\typora-user-images\image-20220720104032599.png)]
@PropertySource(value = "classpath:xue.properties")
public class Person {

    @Value("${name}")
    private String name;
    private Integer age;
    private Boolean happy;
    private Date birth;
    private Map<String,Object> maps;
    private List<Object> lists;
但是这样会乱码
@Data(需要导入Lombok依赖)
可以自动生成get/set方法,equals方法,canEqual方法,hashCode方法,toString方法,无参构造方法
[外链图片转存失败,源站可能有防盗链机制,建议将图片保存下来直接上传(img-ezFDcluz-1661318637421)(C:\Users\28908\AppData\Roaming\Typora\typora-user-images\image-20220721095109167.png)]
@AllArgsConstructor
全参构造方法
[外链图片转存失败,源站可能有防盗链机制,建议将图片保存下来直接上传(img-pjYUhOPJ-1661318637422)(C:\Users\28908\AppData\Roaming\Typora\typora-user-images\image-20220721095137000.png)]
@NoArgsConstructor
无参构造方法
[外链图片转存失败,源站可能有防盗链机制,建议将图片保存下来直接上传(img-1PiqWaQZ-1661318637423)(C:\Users\28908\AppData\Roaming\Typora\typora-user-images\image-20220721095212368.png)]
@Repository(被托管)
@Repository(value=“userDao”)注解是告诉Spring,让Spring创建一个名字叫“userDao”的UserDaoImpl实例。
当Service需要使用Spring创建的名字叫“userDao”的UserDaoImpl实例时,就可以使用@Resource(name = “userDao”)注解告诉Spring,Spring把创建好的userDao注入给Service即可。
@Repository(value="userServiceNew")
public class UserServiceImpl implements UserService {

    @Autowired
    UserMapper userMapper;

    public User Sel(int id){
        return userMapper.Sel(id);
    }
}
@RestController
@RequestMapping("/testBoot")
public class UserController {

    @Resource(name = "userServiceNew")
    private UserService userService;

    @RequestMapping("getUser/{id}")
    public Object GetUser(@PathVariable int id){
        return userService.Sel(id);
    }
}
@Configure
使用注解@Configuration,告诉Spring Boot这是一个配置类。
@EnableWebMvc
@EnableWebMvc注解加上后,发现原本的一些默认配置并没有生效,即该注解加上后将会使用本类的配置为mvc配置,完全覆盖默认配置。所以没有特殊要求尽量不要加上该注解
@PathVariable
@EnableWebSecurity
EnableWebSecurity注解有两个作用,1: 加载了WebSecurityConfiguration配置类, 配置安全认证策略。2: 加载了AuthenticationConfiguration, 配置了认证信息。
@Async
告诉spring这是一个异步任务
@EnableScheduling
//开启定时功能的注解
yaml还可以这样
age: ${random.int}
##如果person.hello存在happy为true否则为false(占位符)
happy: ${person.hello:true} false
松散绑定
就是配置文件里有个属性名叫last-name的话,那么类里要用驼峰命名lastName,而且他的set和get方法名为setLast Name和getLastName
last-name: "张钰"
public String getLastName() {
    return lastName;
}

public void setLastName(String lastName) {
    this.lastName = lastName;
}
JSR303数据校验
- 首先要导入依赖
<dependency>
    <groupId>javax.validation</groupId>
    <artifactId>validation-api</artifactId>
</dependency>
- 接下来进行数据绑定
@Validated//数据校验
public class Person {
    @Email()
    private String lastName;
}
[外链图片转存失败,源站可能有防盗链机制,建议将图片保存下来直接上传(img-t5XYdS9x-1661318637424)(C:\Users\28908\AppData\Roaming\Typora\typora-user-images\image-20220720132638226.png)]
[外链图片转存失败,源站可能有防盗链机制,建议将图片保存下来直接上传(img-b1cKKBOM-1661318637425)(C:\Users\28908\AppData\Roaming\Typora\typora-user-images\image-20220720132805352.png)]
文件配置位置优先级排序
优先级高—>低
properties配置选择运行环境
application.properties
# springboot的多环境配置:可以选择激活其中哪一个文件
spring.profiles.active=test
application-dev.properties
server.port=8081
application-test.properties
server.port=8082
实际运行环境是8082,和appliction.properties里的profiles.active有关
使用debug:true
判断哪些配置生效了哪些没生效
spring boot web开发
什麽是webjars
静态资源访问
- public,static,/**,resources 的直接映射到localhost:8080/这些都存放着静态资源
- 优先级:resource>static(默认)>public
{“classpath:/meta-inf/resources/”, “classpath:/resources/”, “classpath:/static/”, “classpath:/public/”}
@Controller和@RestController的区别
- @RestController相当于@Controller和@ResponseBody合在一起的作用;
- 如果使用@RestController注解Controller层的话,则返回的是return里面的内容,无法返回到指定的页面,配置的视图解析器InternalResourceViewResolver也就自然没有作用了;
- 如果要返回到指定的页面,则需要用@Controller配合视图解析器InternalResourceViewResolver;
- 如果需要返回JSON、XML或自定义mediaType内容到页面,则需要在对应的方法上加上@ResponseBody注解。
//这里用RestController是返回不了test页面的,会返回test字符串
@Controller
public class TestController {

    @RequestMapping("zzzz")
    public String test(Model model){
        model.addAttribute("msg","hello,my name is xue");
        return "test";
    }
}
重定向页面
要现在配置里定义
@Configuration
//@EnableWebMvc
public class MyMvcConfig implements WebMvcConfigurer {
    @Override
    public void addViewControllers(ViewControllerRegistry registry){
//        通过路径"/"和"index.html"
        registry.addViewController("/").setViewName("index");
        registry.addViewController("/index.html").setViewName("index");
        registry.addViewController("/main.html").setViewName("dashboard");
    }
}
@Controller
public class LoginController {
    @RequestMapping("/user/login")
    public String login(@RequestParam("username") String username, @RequestParam("password") String password, Model model){
       if(!StringUtils.isEmpty(username) && "123456".equals(password)){
           return "redirect:/main.html";
       }else{
//           告诉用户登录失败
           model.addAttribute("msg","用户名或者密码错误");
           return "index";
       }
    }
}
配置Druid
首先引入包依赖,找对应的版本
<!-- https://mvnrepository.com/artifact/com.alibaba/druid -->
<dependency>
    <groupId>com.alibaba</groupId>
    <artifactId>druid</artifactId>
    <version>1.1.24</version>
</dependency>
然后在配置文件里引用,application.yaml
spring:
 datasource:
    type: com.alibaba.druid.pool.DruidDataSource
写配置文件进行注入
[外链图片转存失败,源站可能有防盗链机制,建议将图片保存下来直接上传(img-dyj7VxTl-1661318637425)(C:\Users\28908\AppData\Roaming\Typora\typora-user-images\image-20220722123455214.png)]
//配置的话就需要这个注解
@Configuration
public class DruidConfig {
    @ConfigurationProperties(prefix = "spring.datasource")
    @Bean
    public DataSource druidDataSource(){
        return new DruidDataSource();
    }

//    后台监控功能
    @Bean
    public ServletRegistrationBean a(){
        ServletRegistrationBean<StatViewServlet> bean = new ServletRegistrationBean<>(new StatViewServlet(), "/druid/*");
//        后台需要有人登录账号密码
        HashMap<String, String> initParameters = new HashMap<>();
//        增加配置
        initParameters.put("loginUsername","admin");
        initParameters.put("loginPassword","123456");

//        允许谁可以访问
        initParameters.put("allow","");
//        禁止谁访问
        initParameters.put("xue","192.168.11.123");
        bean.setinitParameters(initParameters);//初始化参数
        return bean;
    }
}
[外链图片转存失败,源站可能有防盗链机制,建议将图片保存下来直接上传(img-KrW7rRKx-1661318637426)(C:\Users\28908\AppData\Roaming\Typora\typora-user-images\image-20220722173730479.png)]
[外链图片转存失败,源站可能有防盗链机制,建议将图片保存下来直接上传(img-7KQNP4li-1661318637426)(C:\Users\28908\AppData\Roaming\Typora\typora-user-images\image-20220722173755050.png)]
过滤
//    filter
    @Bean
    public FilterRegistrationBean webStatFilter(){
        FilterRegistrationBean bean = new FilterRegistrationBean();
        bean.setFilter(new WebStatFilter());
//        可以过滤哪些请求呢?
        HashMap<String, String> initParameters = new HashMap<>();
//        这些东西不进行统计
        initParameters.put("exclusions","*.js,*.css,/druid/*");
        bean.setinitParameters(initParameters);

        return bean;

    }
整合Mybatis
MyBatis 是一款优秀的持久层框架,它支持定制化 sql、存储过程以及高级映射。
使用过程
pojo(User实体类)–>mapper(userMapper接口类)–>mybatis(mapper(UserMapper.xml)写sql语句的地方)–>controller(UserController控制层)
整合包
datasource:
  type: com.alibaba.druid.pool.DruidDataSource
  username: root
  password: 123
  url: jdbc:MysqL://localhost:3306/mybatis?serverTime=UTC&useUnicode=true&characterEncoding=utf-8
  driver-class-name: com.MysqL.cj.jdbc.Driver
链接数据库
@SpringBoottest
class Demo2ApplicationTests {

    @Autowired
    DataSource dataSource;

    @Test
    void contextLoads() throws sqlException {
        System.out.println(dataSource.getClass());
        System.out.println(dataSource.getConnection());
    }

}
接口自动扫描
[外链图片转存失败,源站可能有防盗链机制,建议将图片保存下来直接上传(img-rniQSHdn-1661318637427)(C:\Users\28908\AppData\Roaming\Typora\typora-user-images\image-20220723230143593.png)]
package com.example.demo.mapper;

import org.apache.ibatis.annotations.Mapper;
//自动扫描接口第一种方法
//这个注解表示了这是一个mybatis的mapper类
@Mapper
//@Component
@Repository
public interface userMapper {
}
//@SpringBootApplication:标注这是一个springboot应用
@SpringBootApplication
//@MapperScan("com.example.demo.mapper") 自动扫描接口第二种方法
public class Demo2Application {

    public static void main(String[] args) {
        SpringApplication.run(Demo2Application.class, args);
    }

}
配置
#整合mybatis  pojo是实体类
mybatis:
  type-aliases-package: com.example.demo.pojo
  #  这里的classpath就代表resources
  mapper-locations: classpath:mybatis/mapper/*.xml
[外链图片转存失败,源站可能有防盗链机制,建议将图片保存下来直接上传(img-imO9psQM-1661318637428)(C:\Users\28908\AppData\Roaming\Typora\typora-user-images\image-20220723232128796.png)]
UserMapper.xml
[外链图片转存失败,源站可能有防盗链机制,建议将图片保存下来直接上传(img-WQaHJfV9-1661318637429)(C:\Users\28908\AppData\Roaming\Typora\typora-user-images\image-20220723232148925.png)]
注意:记得改namespace
<select id="queryUserById" resultType="User">
<!--这里的#{id}是mapper接口里的方法的参数User queryUserById(int id);-->
    select * from user where  id = #{id}
</select>
userMapper类 接口类
//自动扫描接口第一种方法
//这个注解表示了这是一个mybatis的mapper类
@Mapper
//@Component
@Repository
public interface userMapper {
//    第一个是返回值类型  第二个是方法名
    List<User> queryUserList();
    User queryUserById(int id);
    int addUser(User user);
    int updateUser(User user);
    int deleteUser(int id);

}
UserController类
//非渲染页面
@RestController
@RequestMapping
public class UserController {
    @Autowired
    private UserMapper userMapper;

    @GetMapping("/queryUserList")
    public List<User> queryUserList(){
        List<User> userList = userMapper.queryUserList();

        for(User user : userList){
            System.out.println(user);
        }
        return userList;
    }
}
springSecurity(安全)
在web开发中,安全第一位,过滤器,拦截器
做网站:安全应该在什么时候考虑?在设计之初
漏洞。隐私泄露等等
架构一旦确定,
网络安全知名框架:shiro 、SpringSecurity:很像 除了类不一样名字不一样
认证,授权(vip1,vip2,vip3)
引入包依赖
<dependency>
    <groupId>org.mybatis.spring.boot</groupId>
    <artifactId>mybatis-spring-boot-starter</artifactId>
    <version>2.1.3</version>
</dependency>
springSecurity的两个主要目标就是“认证Authentication”和“授权Authorization”(访问控制)
认证和授权配置
package com.example.demo.config;

import org.springframework.security.config.annotation.authentication.builders.AuthenticationManagerBuilder;
import org.springframework.security.config.annotation.web.builders.HttpSecurity;
import org.springframework.security.config.annotation.web.configuration.EnableWebSecurity;
import org.springframework.security.config.annotation.web.configuration.WebSecurityConfigurerAdapter;
import org.springframework.security.crypto.bcrypt.BCryptPasswordEncoder;


//AOP:拦截器
@EnableWebSecurity
public class SecurityConfig extends WebSecurityConfigurerAdapter {
    @Override
    protected void configure(HttpSecurity http) throws Exception {
//        请求授权的规则
        http.authorizeHttpRequests()
                .antMatchers("/").permitAll()
                .antMatchers("/level1/**").hasRole("vip1");

//        没有权限会默认到登录页 新版的默认开启
        http.formLogin();
    }

//    请求认证的规则 springboot2.1.x 可以直接使用  5.0+写了很多加密方式
    @Override
    protected void configure(AuthenticationManagerBuilder auth) throws Exception {
//        给密码进行硬编码
//        auth.inMemoryAuthentication().withUser("笨蛋张钰").password("123").roles("vip1")
//        .and()
//                .withUser("xxx").password("123").roles("vip2");
//        此时密码多了一些加密的规则
        auth.inMemoryAuthentication().passwordEncoder(new BCryptPasswordEncoder())
                .withUser("笨蛋张钰").password(new BCryptPasswordEncoder().encode("123")).roles("vip1")
        .and()
                .withUser("xxx").password(new BCryptPasswordEncoder().encode("123")).roles("vip2");
    }
}
[外链图片转存失败,源站可能有防盗链机制,建议将图片保存下来直接上传(img-hVA8fldX-1661318637430)(C:\Users\28908\AppData\Roaming\Typora\typora-user-images\image-20220724151213059.png)]
注销
https://docs.spring.io/spring-security/reference/reactive/authentication/logout.html
使用“/tologout”路由进行注销
代码部分配置
@Override
protected void configure(HttpSecurity http) throws Exception {
//        请求授权的规则
    http.authorizeHttpRequests()
            .antMatchers("/").permitAll()
            .antMatchers("/level1/**").hasRole("vip1");

//        没有权限会默认到登录页 新版的默认开启
    http.formLogin();
//        注销功能
     http.logout().logoutSuccessUrl("/");//注销成功跳到首页
}
新版
@Bean
SecurityWebFilterChain http(ServerHttpSecurity http) throws Exception {
DelegatingServerlogoutHandler logoutHandler = new DelegatingServerlogoutHandler(
        new WebSessionServerlogoutHandler(), new SecurityContextServerlogoutHandler()
);
http
.authorizeExchange((exchange) -> exchange.anyExchange().authenticated())
.logout((logout) -> logout.logoutHandler(logoutHandler));

return http.build();
}
thymeleaf
https://www.thymeleaf.org/doc/tutorials/3.0/usingthymeleaf.html#standard-expression-Syntax
相关配置可以看thymeleafProperties.class
格式在templates下的.html文件
[外链图片转存失败,源站可能有防盗链机制,建议将图片保存下来直接上传(img-yNAcebv8-1661318637430)(C:\Users\28908\AppData\Roaming\Typora\typora-user-images\image-20220720211143472.png)]
使用变量
text
///test.html
<body>
<!--所有的html元素都可以被thymeleaf替换接管:th:元素名-->
<div th:text="${msg}"></div>
</body>
///testController使用变量model
@RequestMapping("zzzz")
public String test(Model model){
    model.addAttribute("msg","hello,my name is xue");
    return "test";
}
utext
<!--转义就是把文本转换为html语言-->
<div th:utext="${msg}"></div>

@RequestMapping("zzzz")
public String test(Model model){
    model.addAttribute("msg","<h1>hello,my name is xue</h1>");
    return "test";
}
th:each
<h3 th:each="x:${m}" th:text="${x}"></h3>
    或
<h3 th:each="x:${m}">[[${x}]]</h3>

@RequestMapping("zzzz")
public String test(Model model){
    model.addAttribute("m", Arrays.asList("xue","yu"));
    return "test";
}
Attribute Precedence
[外链图片转存失败,源站可能有防盗链机制,建议将图片保存下来直接上传(img-7UL2PQ5U-1661318637431)(C:\Users\28908\AppData\Roaming\Typora\typora-user-images\image-20220720211406077.png)]
Expression
[外链图片转存失败,源站可能有防盗链机制,建议将图片保存下来直接上传(img-ZpxMyFBh-1661318637432)(C:\Users\28908\AppData\Roaming\Typora\typora-user-images\image-20220720213303617.png)]
Swagger
导包依赖
<!-- https://mvnrepository.com/artifact/io.springfox/springfox-swagger-ui -->
<dependency>
    <groupId>io.springfox</groupId>
    <artifactId>springfox-swagger-ui</artifactId>
    <version>3.0.0</version>
</dependency>
<!-- https://mvnrepository.com/artifact/io.springfox/springfox-swagger2 -->
<dependency>
    <groupId>io.springfox</groupId>
    <artifactId>springfox-swagger2</artifactId>
    <version>3.0.0</version>
</dependency>
编写一个hello工程
写一个config
[外链图片转存失败,源站可能有防盗链机制,建议将图片保存下来直接上传(img-2FoEqTH1-1661318637432)(C:\Users\28908\AppData\Roaming\Typora\typora-user-images\image-20220724172151384.png)]
@Configuration
@EnableSwagger2   //开启swagger
public class SwaggerConfig {
}
访问 测试运行
http://localhost:8080/swagger-ui.html
[外链图片转存失败,源站可能有防盗链机制,建议将图片保存下来直接上传(img-o6fYHagF-1661318637433)(C:\Users\28908\AppData\Roaming\Typora\typora-user-images\image-20220724174740924.png)]
集成的版本
[外链图片转存失败,源站可能有防盗链机制,建议将图片保存下来直接上传(img-K2rQ5uL6-1661318637433)(C:\Users\28908\AppData\Roaming\Typora\typora-user-images\image-20220724174811650.png)]
[外链图片转存失败,源站可能有防盗链机制,建议将图片保存下来直接上传(img-9bea8UtS-1661318637434)(C:\Users\28908\AppData\Roaming\Typora\typora-user-images\image-20220724174819085.png)]
配置swagger
Swagger的bean实例Docket
@Configuration
@EnableSwagger2//开启swagger
public class SwaggerConfig {

//    配置了Swagger的bean实例
    @Bean
    public Docket docket(){
        return new Docket(DocumentationType.SWAGGER_2).apiInfo(apiInfo());
    }


//    配置Swagger信息=apiInfo
    private ApiInfo apiInfo(){
        Contact contact = new Contact("薛佳音", "", "2890807962@qq.com");
        return new ApiInfo("薛佳音的swagger日记",
                "第一个接口文档",
                "1.0", "http://baidu.com",
                contact, "Apache 2.0",
                "http://www.apache.org/licenses/LICENSE-2.0",
                new ArrayList());
    }
}
[外链图片转存失败,源站可能有防盗链机制,建议将图片保存下来直接上传(img-qDrXHQXZ-1661318637434)(C:\Users\28908\AppData\Roaming\Typora\typora-user-images\image-20220724181004554.png)]
swagger配置扫描接口
//    配置了Swagger的bean实例
@Bean
public Docket docket(){
    return new Docket(DocumentationType.SWAGGER_2)
            .apiInfo(apiInfo())
            .select()
//        RequestHandlerSelectors配置要扫描接口的方式
//                .apis(RequestHandlerSelectors.basePackage("com.example.demo.controller"))//指定扫描某个包的接口
            //paths(PathSelectors.ant("/com/**"))过滤什么路径
            .apis(RequestHandlerSelectors.any())//扫描任意一个包
            .build();//
}
配置是否启动
.enable(false)
我只希望我的swagger在生产环境中使用,在发布的时候不使用
- 判断是不是生产环境
- 注入enable(flag)
@Configuration
@EnableSwagger2//开启swagger
public class SwaggerConfig {

//    配置了Swagger的bean实例
    @Bean
    public Docket docket(Environment environment){
//        设置要显示的swagger环境
        Profiles profiles = Profiles.of("dev","test");
//        获取项目的环境:通过environment.acceptsProfiles判断是否处在自己设定的环境
        boolean b = environment.acceptsProfiles(profiles);
        return new Docket(DocumentationType.SWAGGER_2)
                .apiInfo(apiInfo())
                .enable(false)
                .select()
//        RequestHandlerSelectors配置要扫描接口的方式
//                .apis(RequestHandlerSelectors.basePackage("com.example.demo.controller"))//指定扫描某个包的接口
                //paths(PathSelectors.ant("/com/**"))过滤什么路径

                .apis(RequestHandlerSelectors.any())//扫描任意一个包
                .build();//
    }
[外链图片转存失败,源站可能有防盗链机制,建议将图片保存下来直接上传(img-EIPrwpB2-1661318637435)(C:\Users\28908\AppData\Roaming\Typora\typora-user-images\image-20220724190145201.png)]
[外链图片转存失败,源站可能有防盗链机制,建议将图片保存下来直接上传(img-uipd6QWi-1661318637435)(C:\Users\28908\AppData\Roaming\Typora\typora-user-images\image-20220724190156993.png)]
[外链图片转存失败,源站可能有防盗链机制,建议将图片保存下来直接上传(img-Vxug3Vli-1661318637436)(C:\Users\28908\AppData\Roaming\Typora\typora-user-images\image-20220724190215513.png)]
[外链图片转存失败,源站可能有防盗链机制,建议将图片保存下来直接上传(img-9Q8ooRvg-1661318637436)(C:\Users\28908\AppData\Roaming\Typora\typora-user-images\image-20220724190229175.png)]
配置api文档的分组
.GroupName(“xue”)
如何配置多个分组?
[外链图片转存失败,源站可能有防盗链机制,建议将图片保存下来直接上传(img-KB9HBjyq-1661318637437)(C:\Users\28908\AppData\Roaming\Typora\typora-user-images\image-20220724192606337.png)]
@Bean
public Docket docket2(){
    return new Docket(DocumentationType.SWAGGER_2).groupName("A");
}

@Bean
public Docket docket3(){
    return new Docket(DocumentationType.SWAGGER_2).groupName("B");
}
@Bean
public Docket docket4(){
    return new Docket(DocumentationType.SWAGGER_2).groupName("C");
}
@Bean
public Docket docket5(){
    return new Docket(DocumentationType.SWAGGER_2).groupName("D");
}
扫描model
User类(属性必须是public)
public class User {
    public String username;
    public String password;
}
接口Controller
//    只要我们的接口中,返回值中存在实体类,他就会被扫描到Swagger
@GetMapping("/user")
public User user(){
    return new User();
}
给model加注释
//给model实体类加注释
@ApiModel("用户")
public class User {
    @ApiModelProperty("用户名")
    public String username;
    @ApiModelProperty("密码")
    public String password;
}
给接口和属性加注释
[外链图片转存失败,源站可能有防盗链机制,建议将图片保存下来直接上传(img-8TRBRMak-1661318637437)(C:\Users\28908\AppData\Roaming\Typora\typora-user-images\image-20220725093206664.png)]
//    api接口不是放在类上的 是方法  给方法加个注释
@ApiOperation("hello控制类")
@GetMapping(value = "/hello2")
public String hello(@ApiParam("用户名") String username){
    return "hello"+username;
}
任务
异步任务
[外链图片转存失败,源站可能有防盗链机制,建议将图片保存下来直接上传(img-xodMNpT0-1661318637438)(C:\Users\28908\AppData\Roaming\Typora\typora-user-images\image-20220725095425857.png)]
@EnableAsync
//enable....开启某个功能 enableAsync开启异步注解功能
@SpringBootApplication
public class Demo3Application {

    public static void main(String[] args) {
        SpringApplication.run(Demo3Application.class, args);
    }

}
//写在启动类上
邮件任务
导依赖
<dependency>
    <groupId>com.github.luues</groupId>
    <artifactId>spring-boot-starter-email</artifactId>
    <version>1.3.0.5.RELEASE</version>
</dependency>
配置
spring.mail.username=2890807962@qq.com
spring.mail.password=a15028922060
spring.mail.host=smtp.qq.com
#开启加密验证
spring.mail.properties.main.smtp.ssl.enable=true
测试类
@SpringBoottest
class Demo3ApplicationTests {

    @Autowired
    JavaMailSenderImpl mailSender;
    @Test
    void contextLoads() {
        SimpleMailMessage simpleMailMessage = new SimpleMailMessage();
        simpleMailMessage.setSubject("张钰哈哈哈");
        simpleMailMessage.setText("你是个笨蛋啊");
//        simpleMailMessage.setTo("2782906917@qq.com");
        simpleMailMessage.setTo("2890807962@qq.com");
        simpleMailMessage.setFrom("2890807962@qq.com");
        ;
        mailSender.send(simpleMailMessage);
    }

}
[外链图片转存失败,源站可能有防盗链机制,建议将图片保存下来直接上传(img-wXpgCVHd-1661318637439)(C:\Users\28908\AppData\Roaming\Typora\typora-user-images\image-20220725104804793.png)]
[外链图片转存失败,源站可能有防盗链机制,建议将图片保存下来直接上传(img-l0UEKyWs-1661318637440)(C:\Users\28908\AppData\Roaming\Typora\typora-user-images\image-20220725105732492.png)]
计划任务
//    cron表达式  计划任务  在约定的时间执行
    //秒 分 时  日 月  周几
     @Scheduled(cron = "0 * * * * 0-7")
    public void hello2(){
        System.out.println("你被执行了");
    }
过程遇到的方法
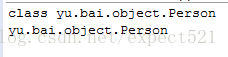
getClass()
getClass() 返回此 Object 的运行时类。
public class Test {
    public static void main(String[] args) {
        Person p = new Person(1,"刘德华");
        System.out.println(p.getClass());
        System.out.println(p.getClass().getName());
    }
}

class Person{
    int id;
    String name;
    public Person(int id, String name) {
        super();
        this.id = id;
        this.name = name;
    }
}
运行结果
getConnection()
过程遇到的问题
为什么接口里面的值必须是常量final且静态static
// 接口里面的值必须是常量final且静态static
   public static final int age = 18;
知识点1:一个类,首先他会在内存里面有一个类对象,然后由类对象生成类的对象 知识点2:为什么接口Interface里面的值必须是常量呢? 因为类可以被实例化,实例化的类的对象里面的变量就会被赋初始值。比如String 是 null int是0,double是0.0。但是接口呢?接口不能被实例化,所以接口里面如果是变量的话不会被赋初始值这样就会出问题。所以接口里面的值必须是常量final而且一定是static不管写不写都是(这句话引用自李老师的讲课内容)知识点3:那为什么它要是静态的呢?因为static是什么?是所有对象可以访问,而且可以直接通过类名访问。接口有对象么?显然没有,必须通过类名来访问所以是要静态的。
/* 和/**的区别
/* 是拦截所有的文件夹,不包含子文件夹
/** 是拦截所有的文件夹及里面的子文件夹
::
[外链图片转存失败,源站可能有防盗链机制,建议将图片保存下来直接上传(img-t4L7LYzh-1661318637441)(C:\Users\28908\AppData\Roaming\Typora\typora-user-images\image-20220823155526801.png)]
的运行时类。
public class Test {
    public static void main(String[] args) {
        Person p = new Person(1,"刘德华");
        System.out.println(p.getClass());
        System.out.println(p.getClass().getName());
    }
}

class Person{
    int id;
    String name;
    public Person(int id, String name) {
        super();
        this.id = id;
        this.name = name;
    }
}
运行结果
getConnection()
过程遇到的问题
为什么接口里面的值必须是常量final且静态static
// 接口里面的值必须是常量final且静态static
   public static final int age = 18;
知识点1:一个类,首先他会在内存里面有一个类对象,然后由类对象生成类的对象 知识点2:为什么接口Interface里面的值必须是常量呢? 因为类可以被实例化,实例化的类的对象里面的变量就会被赋初始值。比如String 是 null int是0,double是0.0。但是接口呢?接口不能被实例化,所以接口里面如果是变量的话不会被赋初始值这样就会出问题。所以接口里面的值必须是常量final而且一定是static不管写不写都是(这句话引用自李老师的讲课内容)知识点3:那为什么它要是静态的呢?因为static是什么?是所有对象可以访问,而且可以直接通过类名访问。接口有对象么?显然没有,必须通过类名来访问所以是要静态的。
/* 和/**的区别
/* 是拦截所有的文件夹,不包含子文件夹
/** 是拦截所有的文件夹及里面的子文件夹
::
[外链图片转存中…(img-t4L7LYzh-1661318637441)]
原文地址:https://www.jb51.cc/wenti/3284363.html
版权声明:本文内容由互联网用户自发贡献,该文观点与技术仅代表作者本人。本站仅提供信息存储空间服务,不拥有所有权,不承担相关法律责任。如发现本站有涉嫌侵权/违法违规的内容, 请发送邮件至 dio@foxmail.com 举报,一经查实,本站将立刻删除。

